[How To] Load VMD/IRST driver during Windows installation
Answer
This guide explains how to load the Intel Rapid Storage Technology (IRST) driver during a clean Windows installation.
This article applies to all MSI notebooks equipped with Intel processors.
When the VMD Controller option in the BIOS is set to Enabled, the IRST driver must be loaded during Windows installation for the disks or RAID arrays to be properly recognized.
Note: Starting with MSI notebooks equipped with Intel 13th Gen processors, the VMD Controller is enabled by default.
1. Download the "Intel Rapid Storage Technology F6 Driver" from the product support page on the MSI website, extract the driver, and save it to the root directory of a USB drive.
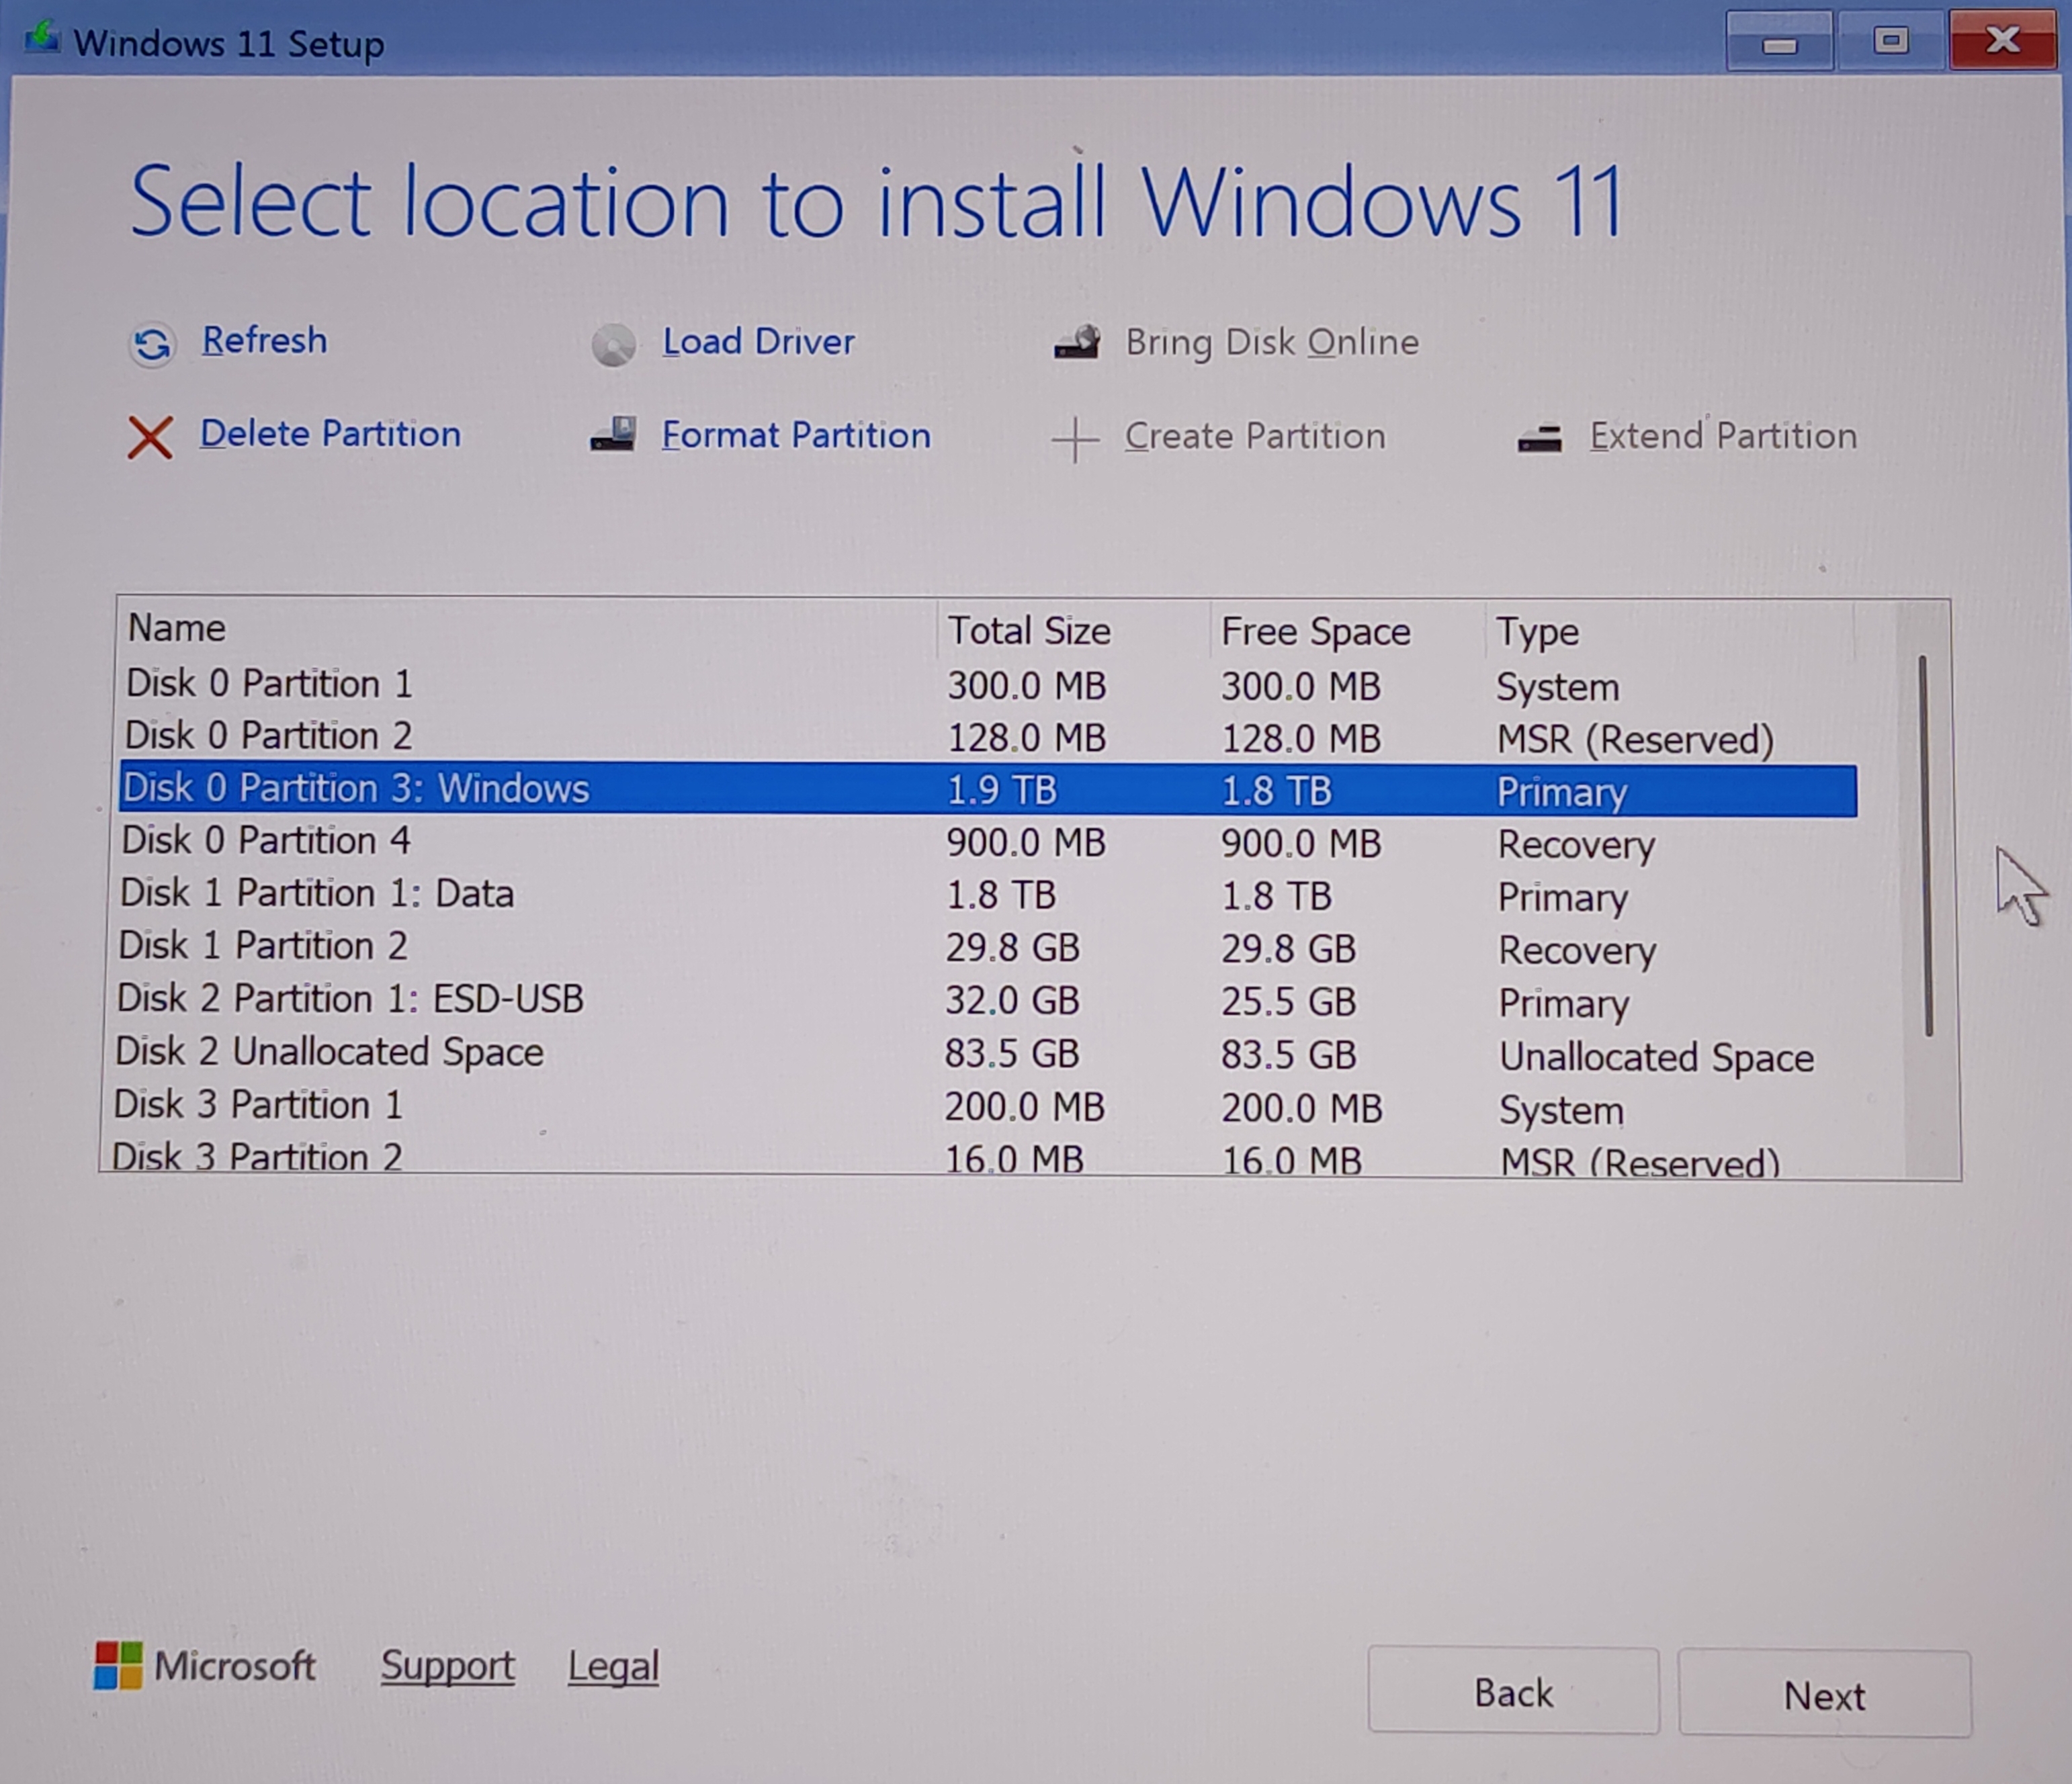
2. During Windows installation, when the following window appears asking where to install Windows, click "Load driver."
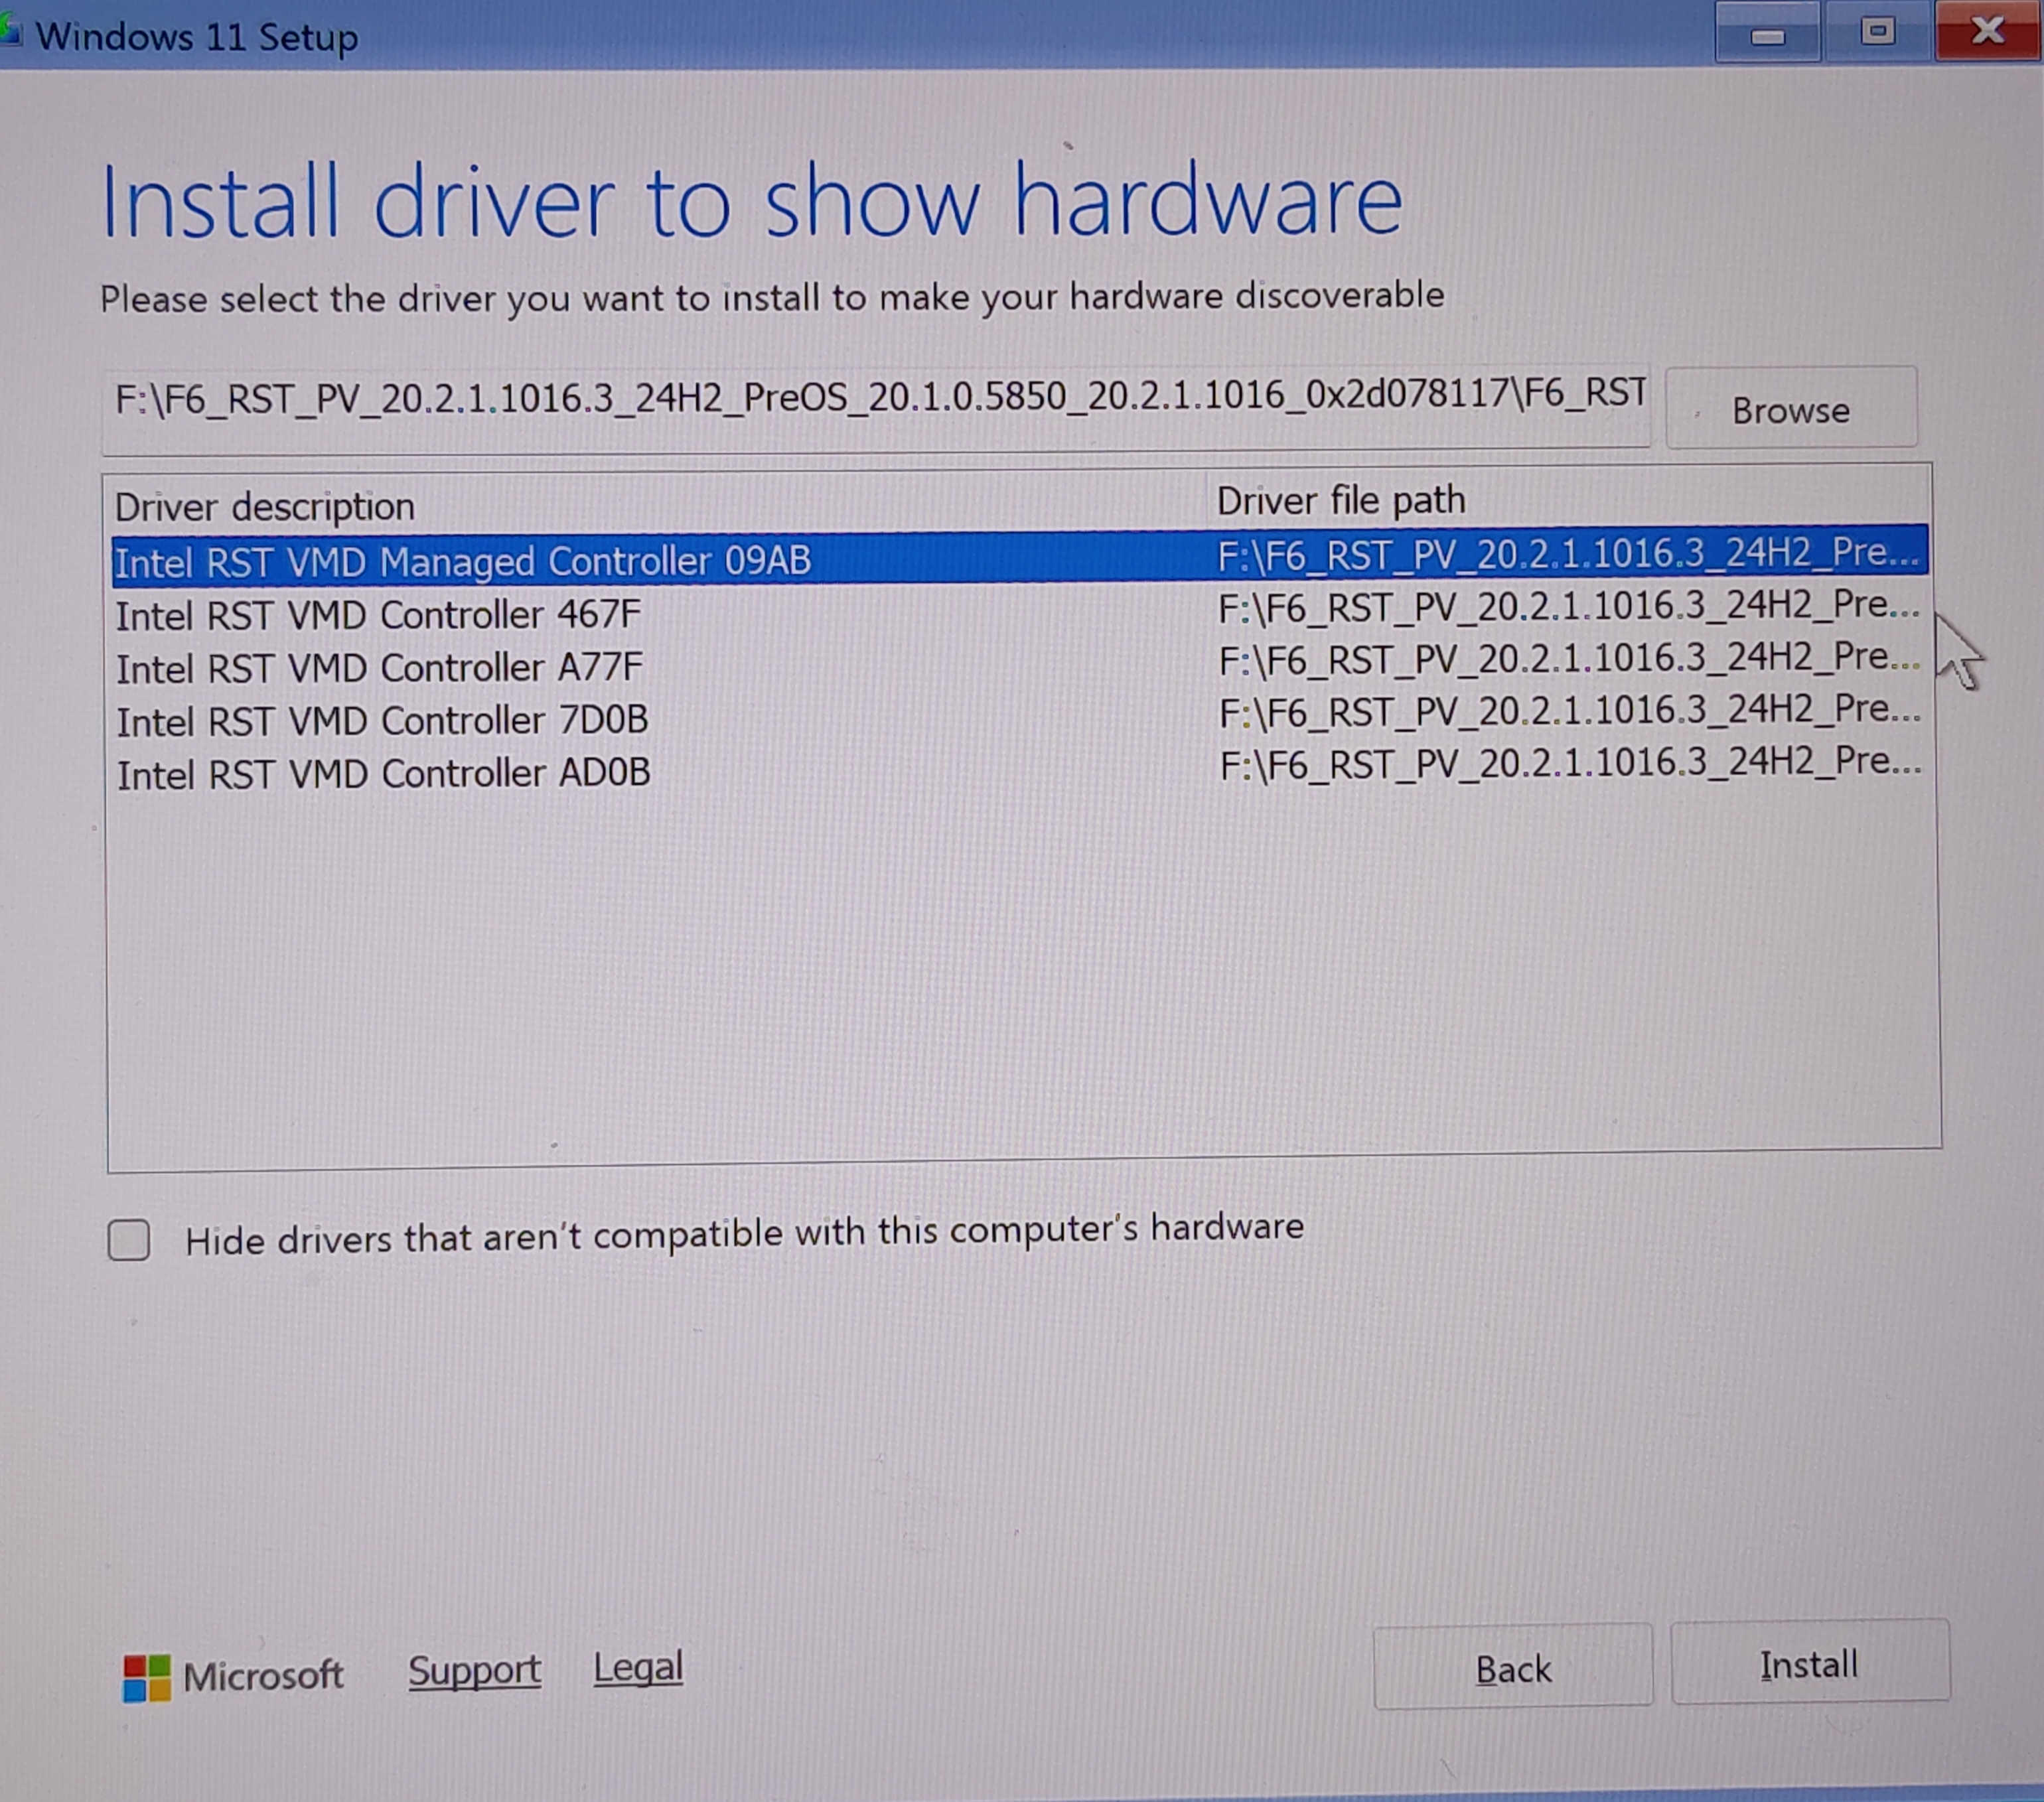
3. Insert the prepared USB drive, then click "Browse" when the "Install driver to show hardware" window appears.
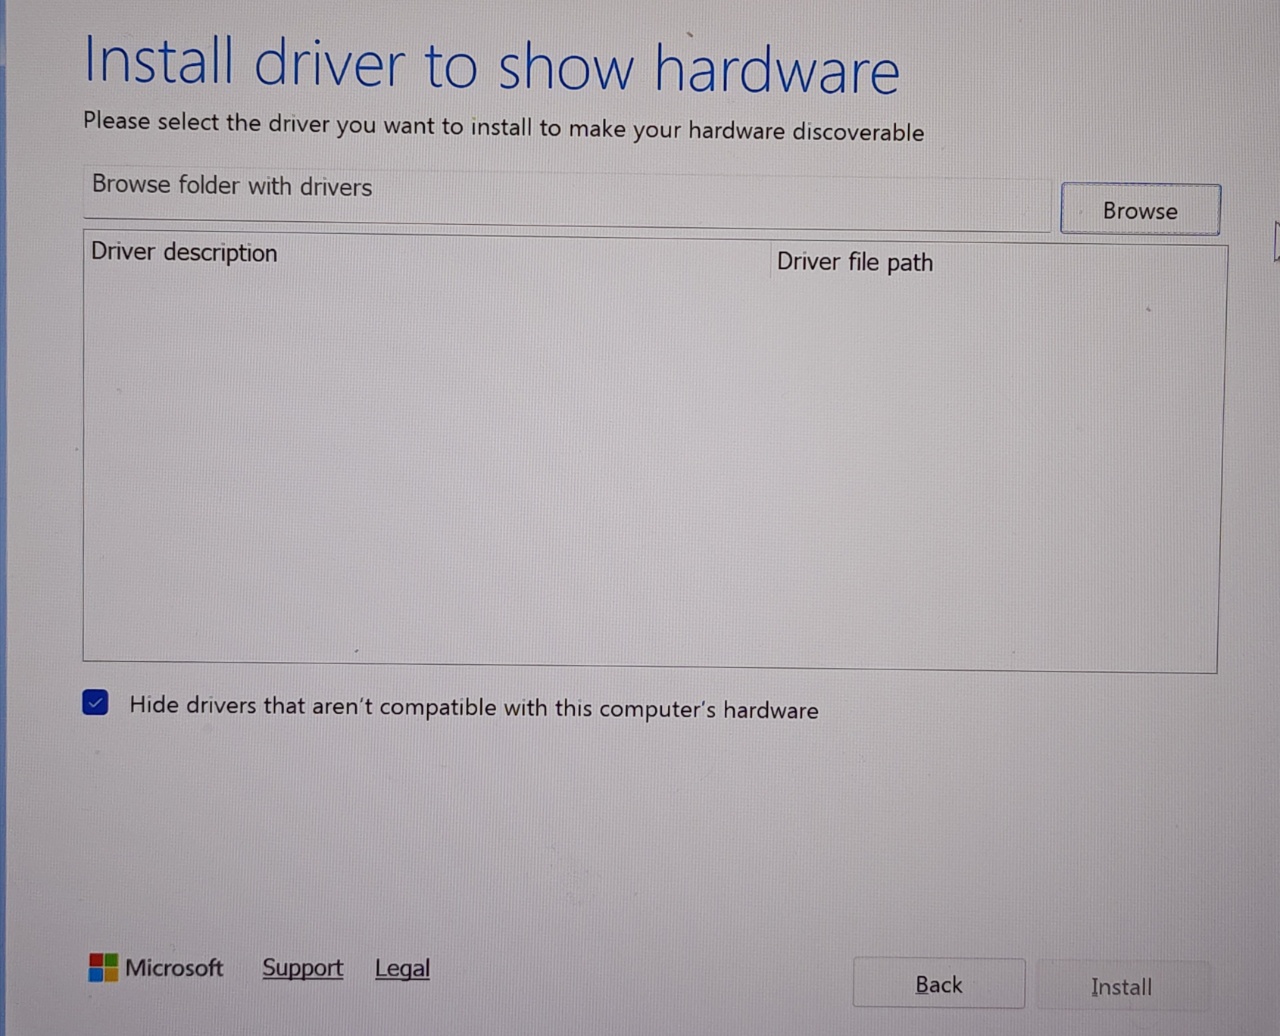
4. Select the F6 driver folder:
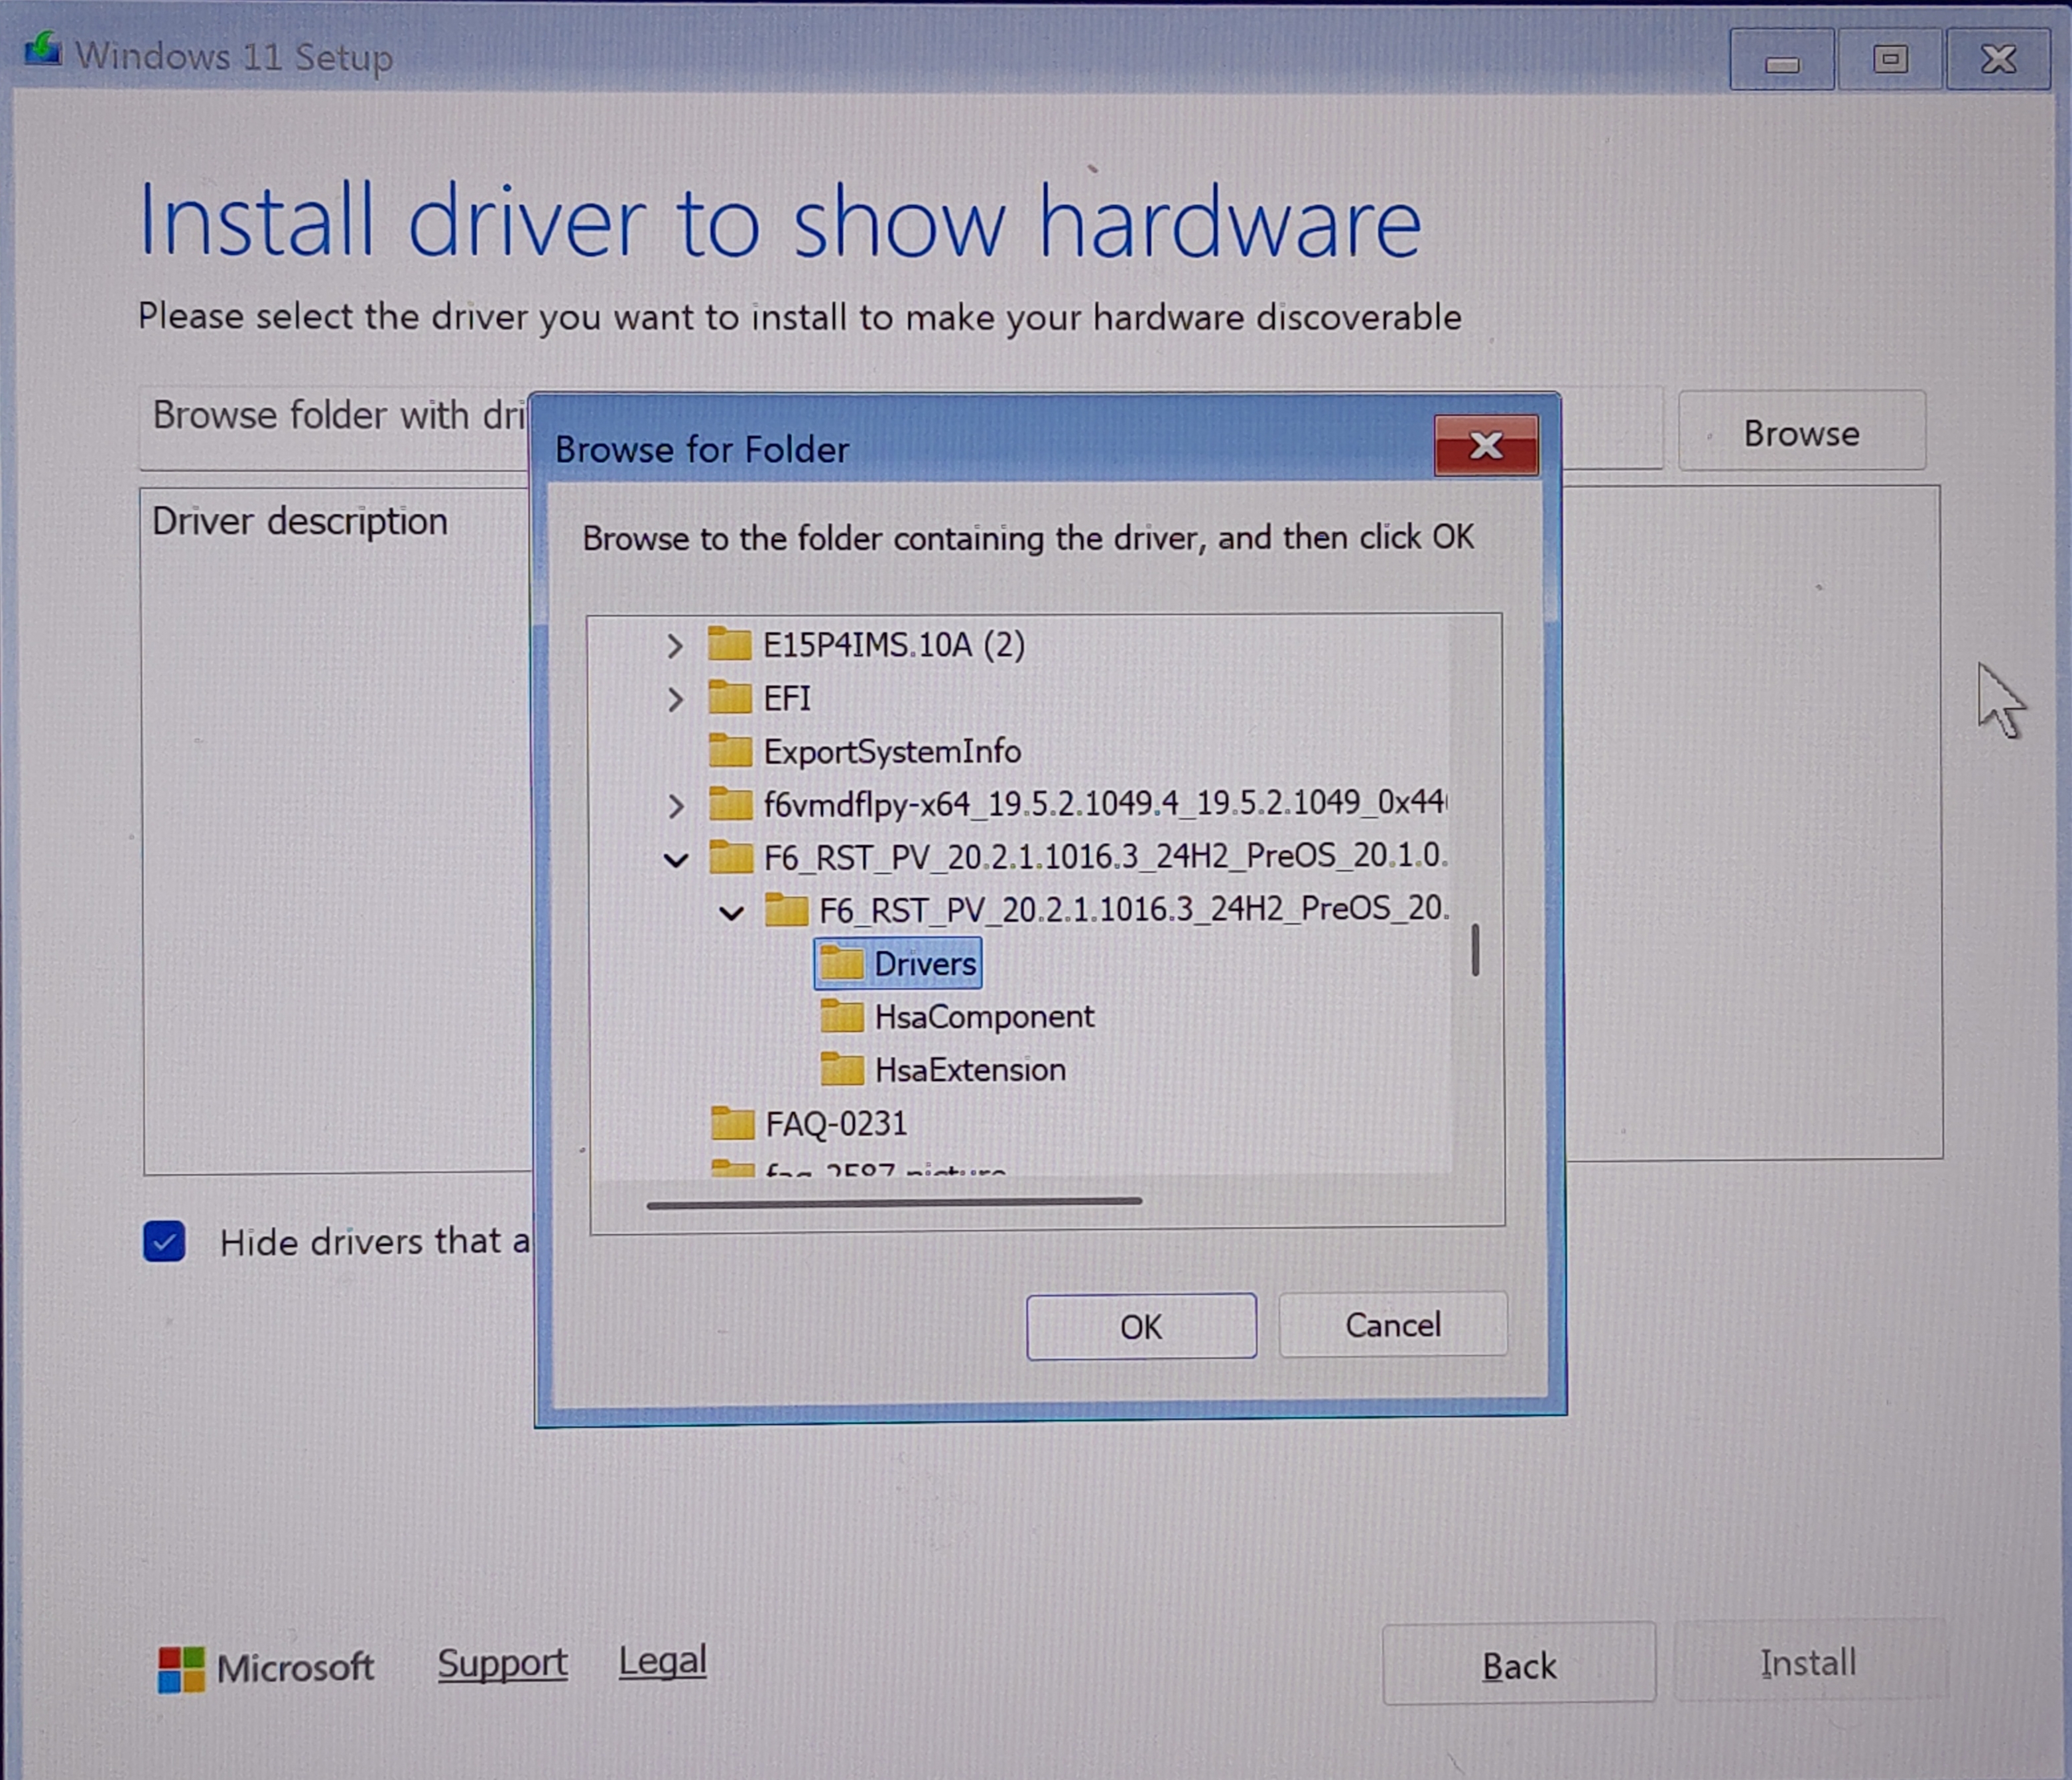
4.1 If the F6 driver version is 20.x, select the "Drivers" folder, then click "OK."
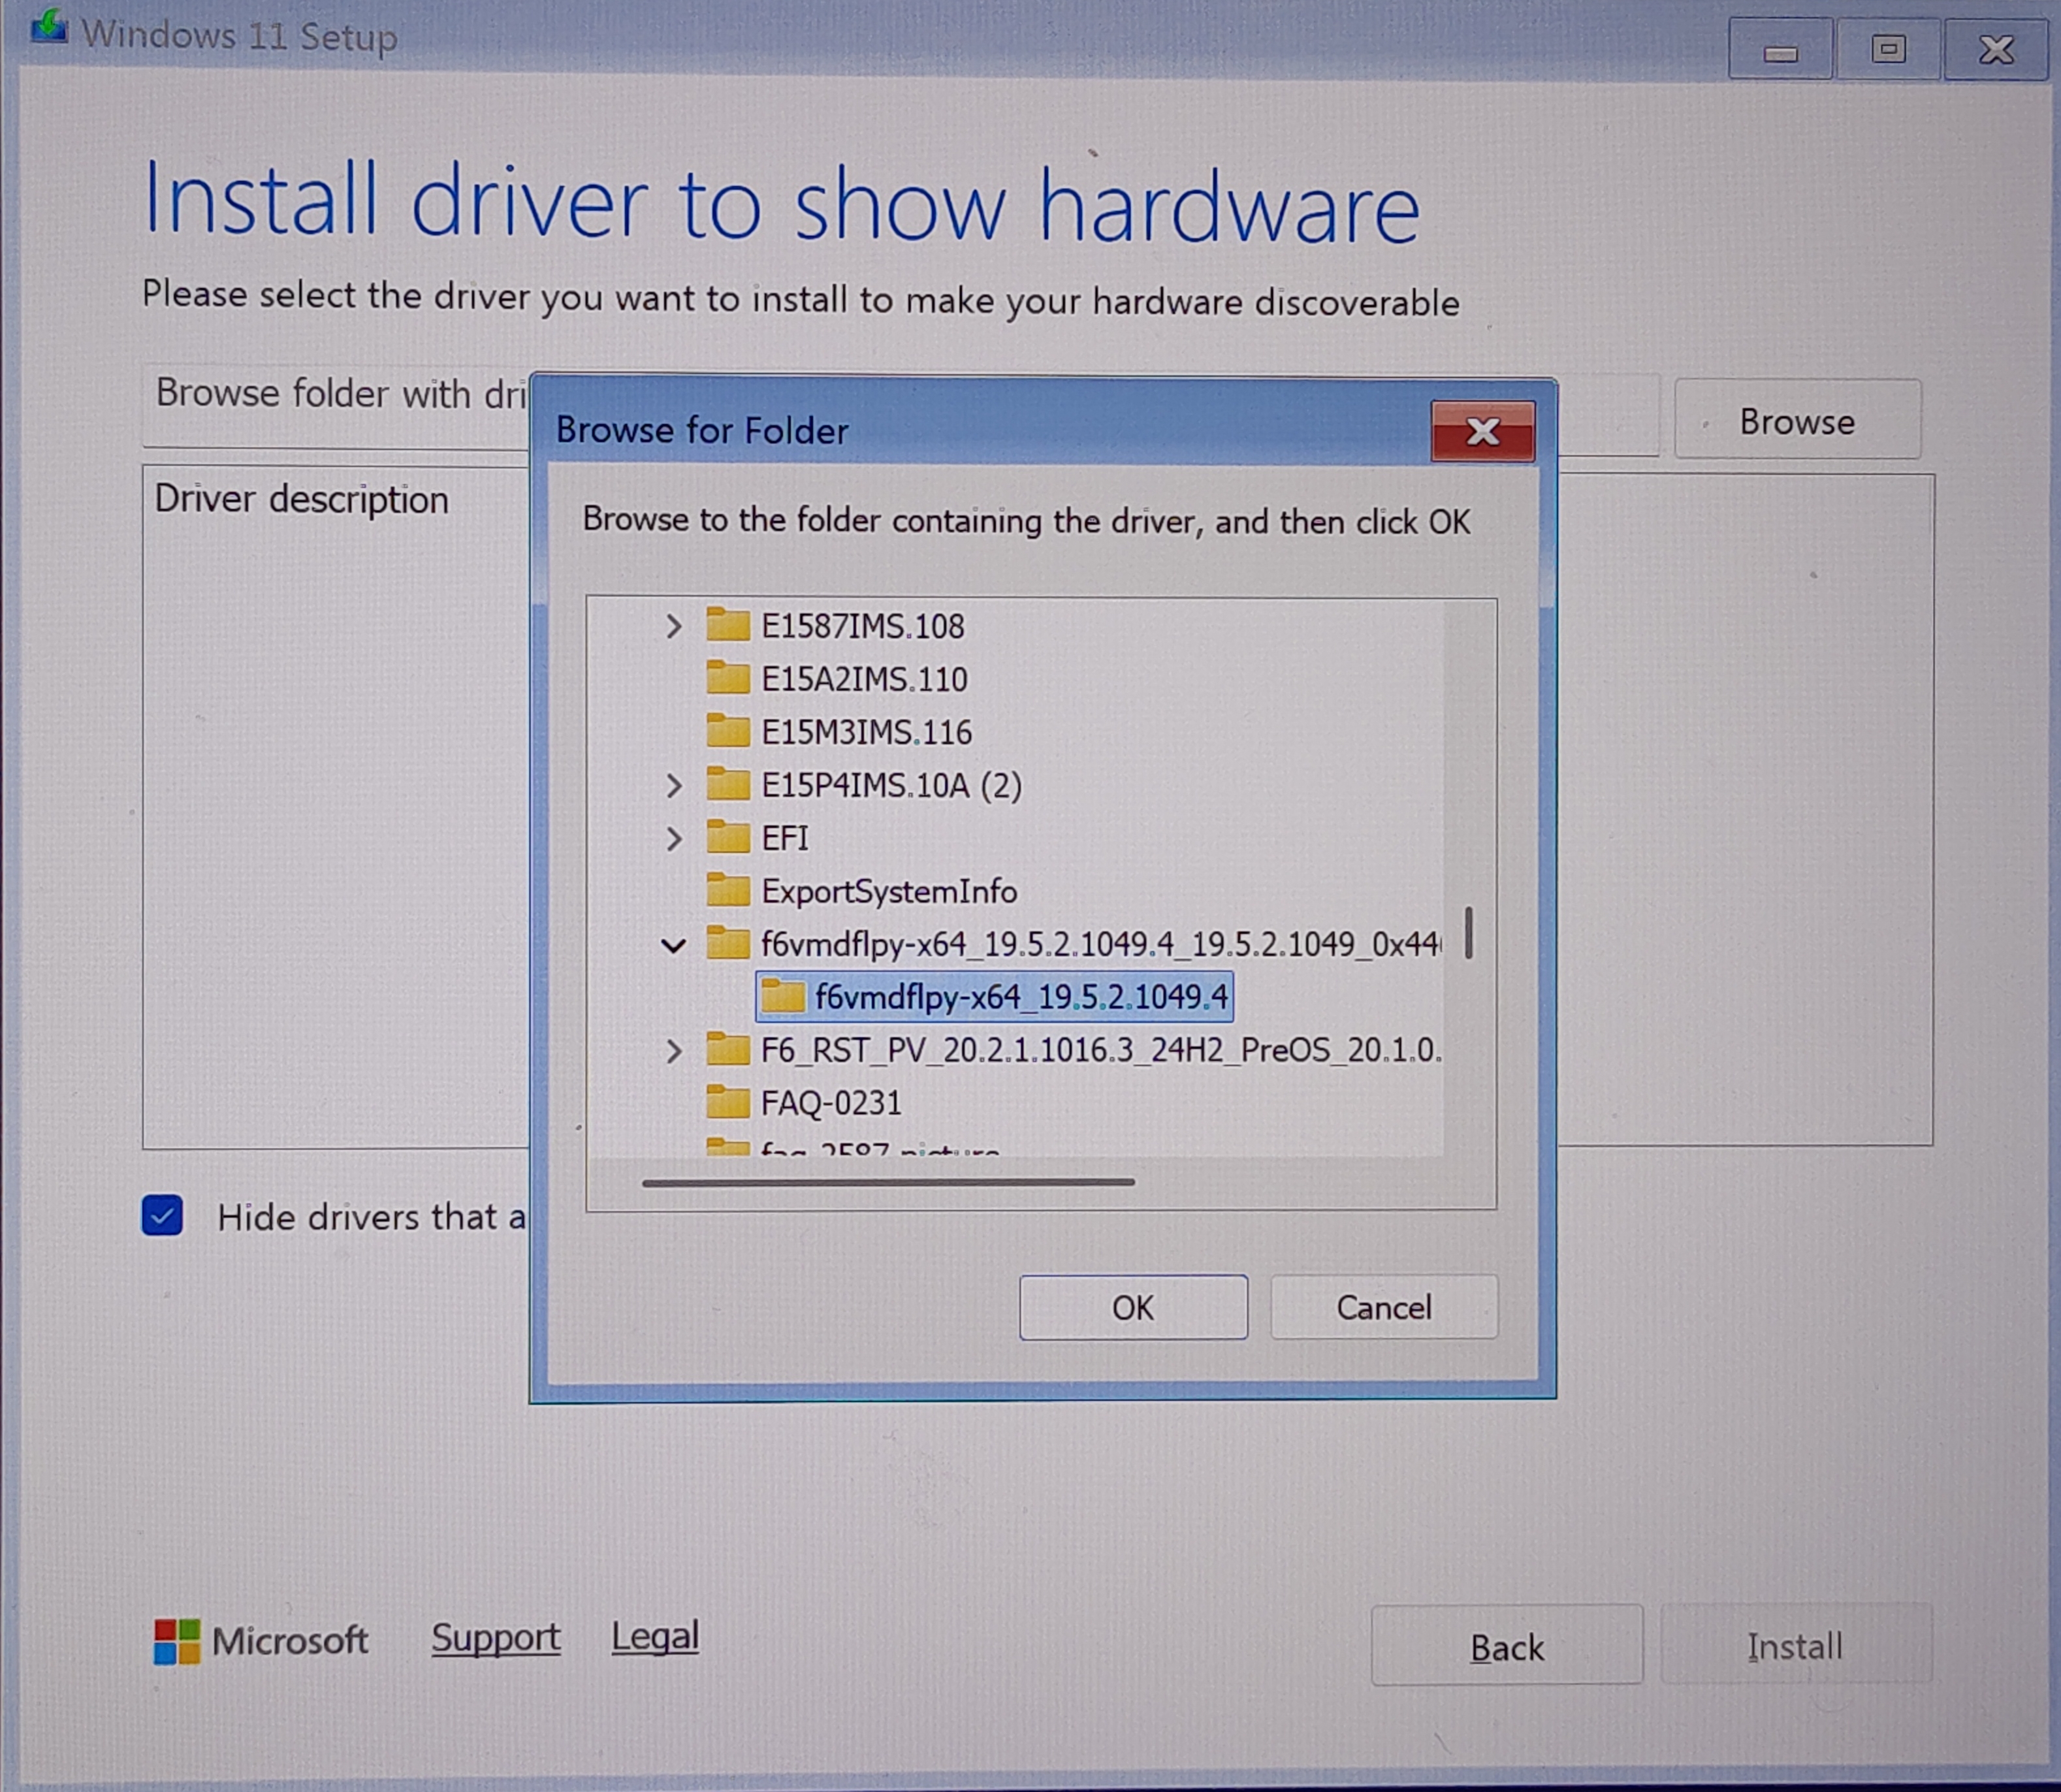
4.2 If the F6 driver version is 19.x, select the "f6vmdflpy-x64" folder under the "VMD" folder, then click "OK."
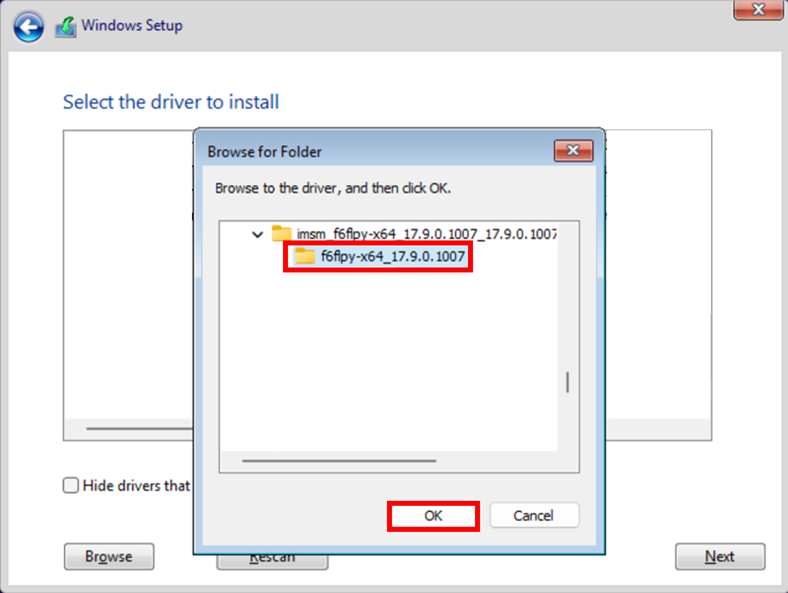
4.3 For notebooks equipped with Intel 10th Gen or older CPUs, select the "f6flpy-x64" folder in the root directory, then click "OK."
5. Install the driver:
5.1 For F6 driver version 20.x or 19.x, select "RST VMD Managed Controller" from the list, then click "Install" to install the driver.
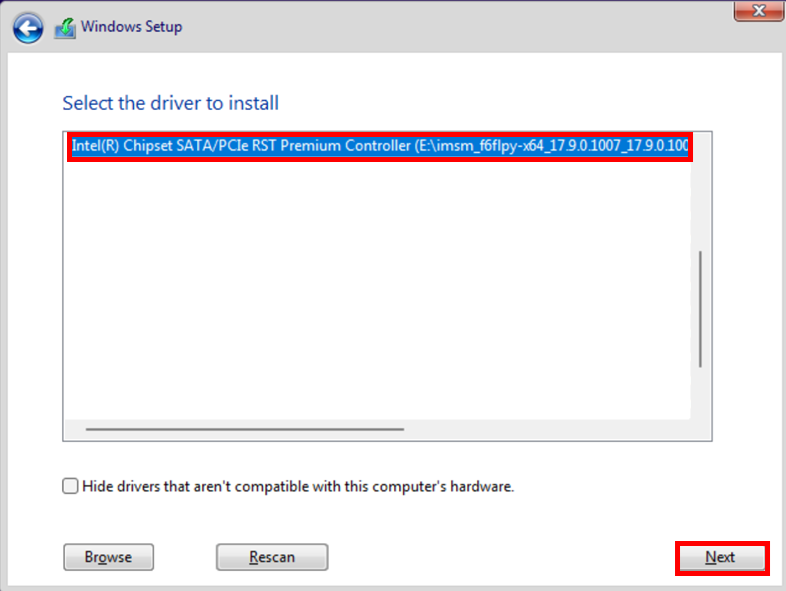
5.2 For notebooks equipped with Intel 10th Gen or older CPUs, select "Intel Chipset SATA/PCIe RST Premium Controller" or "Intel Chipset SATA RAID Controller," then click "Next" to install the driver.
6. Once the driver installation is complete, the required disk drive will be displayed correctly.
Further Reading:
How to Reinstall the OS and Update Drivers on an MSI Notebook (Intel 11th Gen CPU Platform)