[How To] How to Set Up an External Monitor on an MSI Notebook
Answer
After connecting an external monitor to your MSI notebook, you may occasionally experience issues such as no image on the monitor, only a partial display, incorrect resolution, or the computer failing to detect the connected screen. These situations are typically related to display output settings, GPU mode configuration, or driver status, and are not caused by a design limitation of your notebook. This guide will walk you through the setup process and basic troubleshooting steps.
Applicable to all MSI notebooks equipped with external monitor output ports
Layer 1: System-Level Display Settings
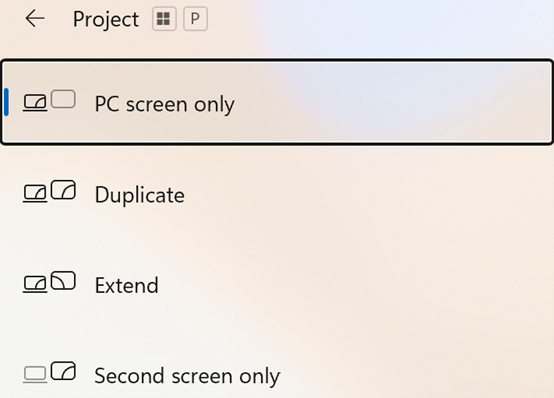
After connecting the external monitor, press Windows key + P and select「Extend」or「Duplicate」mode to start using multiple displays
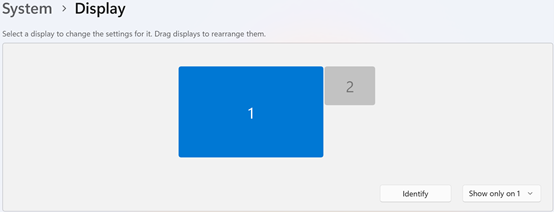
Adjust display arrangement and set the primary monitor Settings → System → Display. On this page, drag to adjust the relative position of each screen and designate which screen to use as the primary display
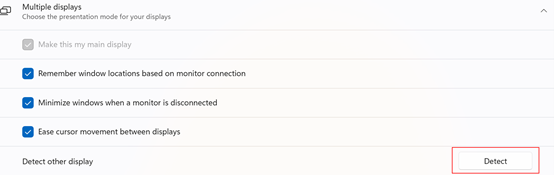
If the external monitor is not detected, click the「Detect」button on this page to search for connected displays again
Layer 2: How to Switch MUX Switch (Discrete GPU Direct Output Mode)
On some models, external monitor issues may be related to the GPU connection mode. If the issue persists after completing Layer 1, try switching the MUX Switch:
Open the system management software pre-installed on your notebook (e.g., MSI Center)
Navigate to Features → User Scenario → GPU Switch (image)
Switch between「Discrete Graphics Mode」and「MSHybrid Graphics Mode」. After switching, the system will prompt you to restart
After restarting, reconnect the external monitor and test
Layer 3: Basic Troubleshooting
Update or reinstall the graphics driver It is recommended to perform a clean installation of the graphics driver to rule out display issues caused by the driver itself. Please refer to the corresponding guide based on the GPU in your notebook:
Intel GPU: refer to [How To] Intel graphics driver Clean Install/Update
NVIDIA GPU: refer to [How To] NVIDIA graphics driver Clean Install/Update
AMD GPU: refer to [How To] Clean Install/Upgrade AMD Graphics Driver and Radeon Software
Cross-test to rule out hardware factors Perform the following tests in order to identify the source of the issue:
Replace the cable to determine whether the cable itself is the cause
Try a different output port (HDMI / DisplayPort / USB-C) to check whether the issue is specific to a particular port
Connect the external monitor to another device to determine whether the monitor itself is the cause
Confirm that the Input Source setting on the external monitor corresponds to the correct port
FAQ
Q: I pressed Windows key + P but nothing happened. What should I do?
A: First check whether the external monitor appears in Settings → System → Display. If it does not appear, check the cable and port connections, then try the shortcut again.
Q: The external monitor is showing an image but the resolution is incorrect. What should I do?
A: Go to Settings → System → Display, locate the external monitor, and manually select「Recommended」or the monitor's native resolution from the resolution options.