[How To] How to Create a System Backup File on MSI Laptops with Factory Preloaded OS
Answer
If your MSI notebook comes with the factory-installed Windows operating system, it is recommended that you create a USB recovery drive as soon as possible while the system is operating normally. If the system fails to boot, becomes unstable, or requires reinstallation, you can use the USB recovery drive to quickly restore your laptop to its original factory settings.
Applicable Operating Systems: Windows 11, Windows 10 (Models that retain the MSI Recovery function)
MSI recommends that all users create a USB recovery drive to help restore the system if unexpected issues occur. Follow the steps below to create recovery media and restore the factory-installed system using MSI Center/ MSI Dragon Center/MSI Creator Center/ MSI Center Pro.
Ⅰ.Create System Recovery Media
Ⅱ.Verify That the Recovery Files Have Been Generated Successfully
Ⅲ.Restore the Windows System Using Recovery Media
Before Starting:
1)Use a USB flash drive with a capacity of 32 GB or larger to create the USB recovery drive.
2)Keep the AC adapter connected throughout the entire recovery process.
3)Do not move or delete any system files, or perform disk cleanup on the system drive.
Ⅰ.Create System Recovery Media
Go to the Utilities tab on your notebook's product support page on the MSI website to verify whether it supports the UWP version of MSI Center, MSI Dragon Center, MSI Creator Center, or MSI Center Pro. If a Microsoft Store download link for the supported application is available, follow the steps below to create the system recovery media.
Note:The system recovery files created using the following procedures can be used to restore your laptop to its original factory settings if the system encounters a problem.
Step:
1.Create System Recovery Media in MSI Center / MSI Dragon Center / MSI Creator Center
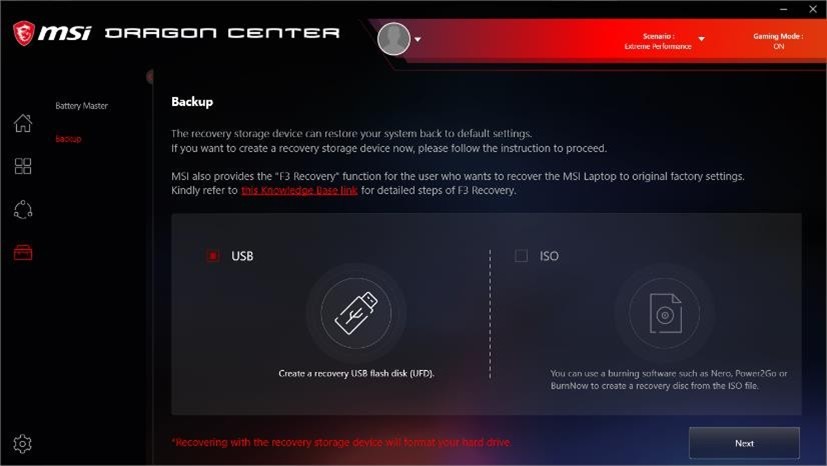
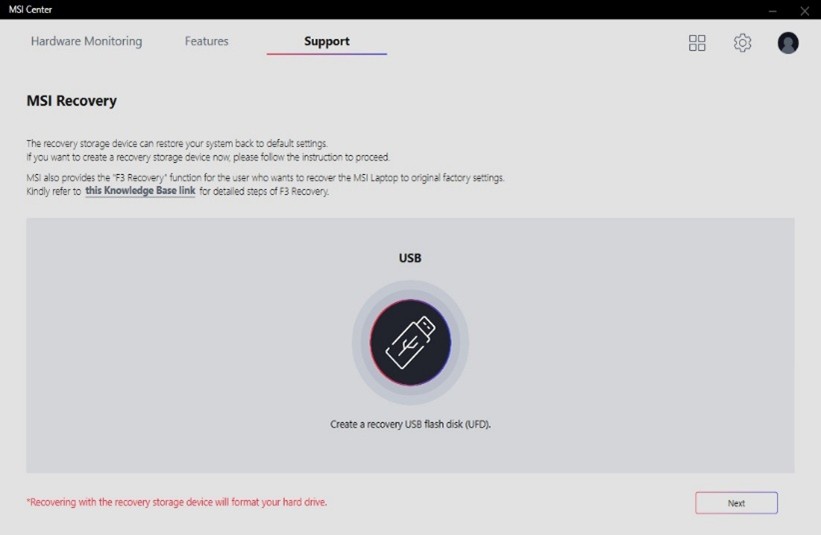
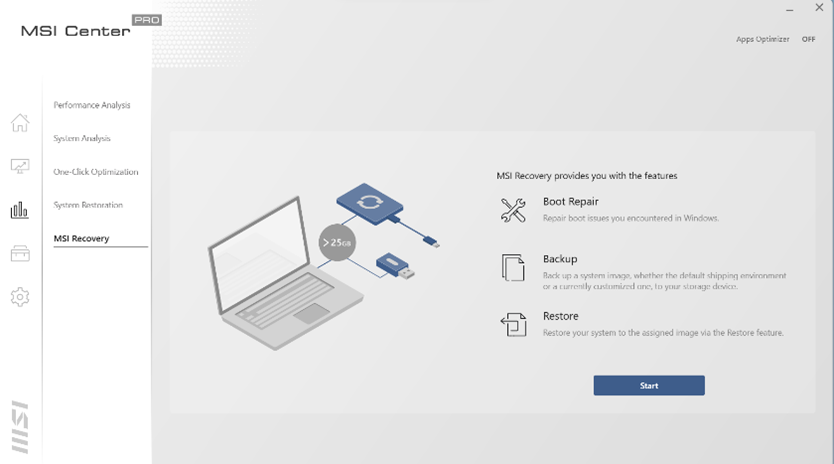
Note:
1)For notebooks that support MSI Dragon Center or MSI Creator Center, open MSI Dragon Center or MSI Creator Center, then navigate to Tools > Backup.
2)For notebooks that support MSI Center, open MSI Center, then navigate to Support > MSI Recovery.
3)For notebooks that support MSI Center Pro, open MSI Center Pro, then navigate to System Diagnosis > MSI Recovery.
2.1 Create a USB recovery drive
1)Select the [USB] option and follow the on-screen instructions.
2)Insert a USB flash drive with sufficient storage capacity.
3)Select the drive letter of the connected USB flash drive and click [Next].
4)Click [OK],the program will format the USB drive and proceed with the creation process.
5)Wait for the completion prompt indicating the USB recovery drive has been successfully created.
2.2 Generate a Recovery ISO Image File
1)Select the [ISO] option and follow the on-screen instructions.
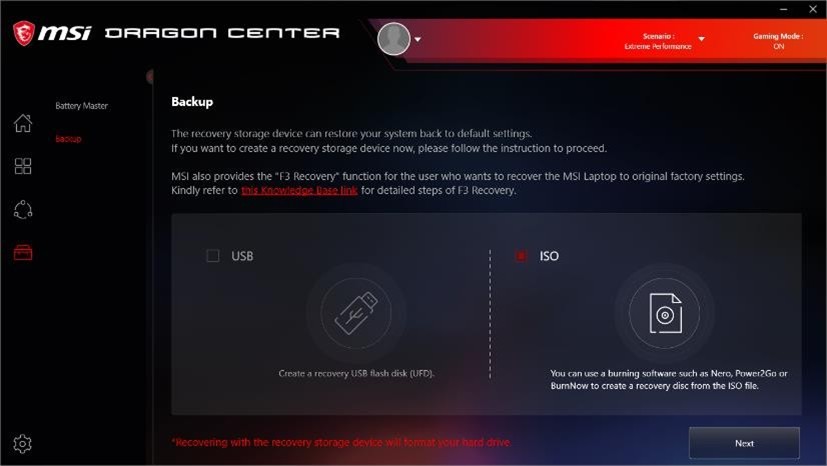
2)Choose a save directory for the ISO file and click [Next].
3)The system recovery ISO image file will be generated and saved.
4)This ISO file can be used with disc burning software to create a system recovery DVD.
Ⅱ.Verify That the Recovery Files Have Been Generated Successfully
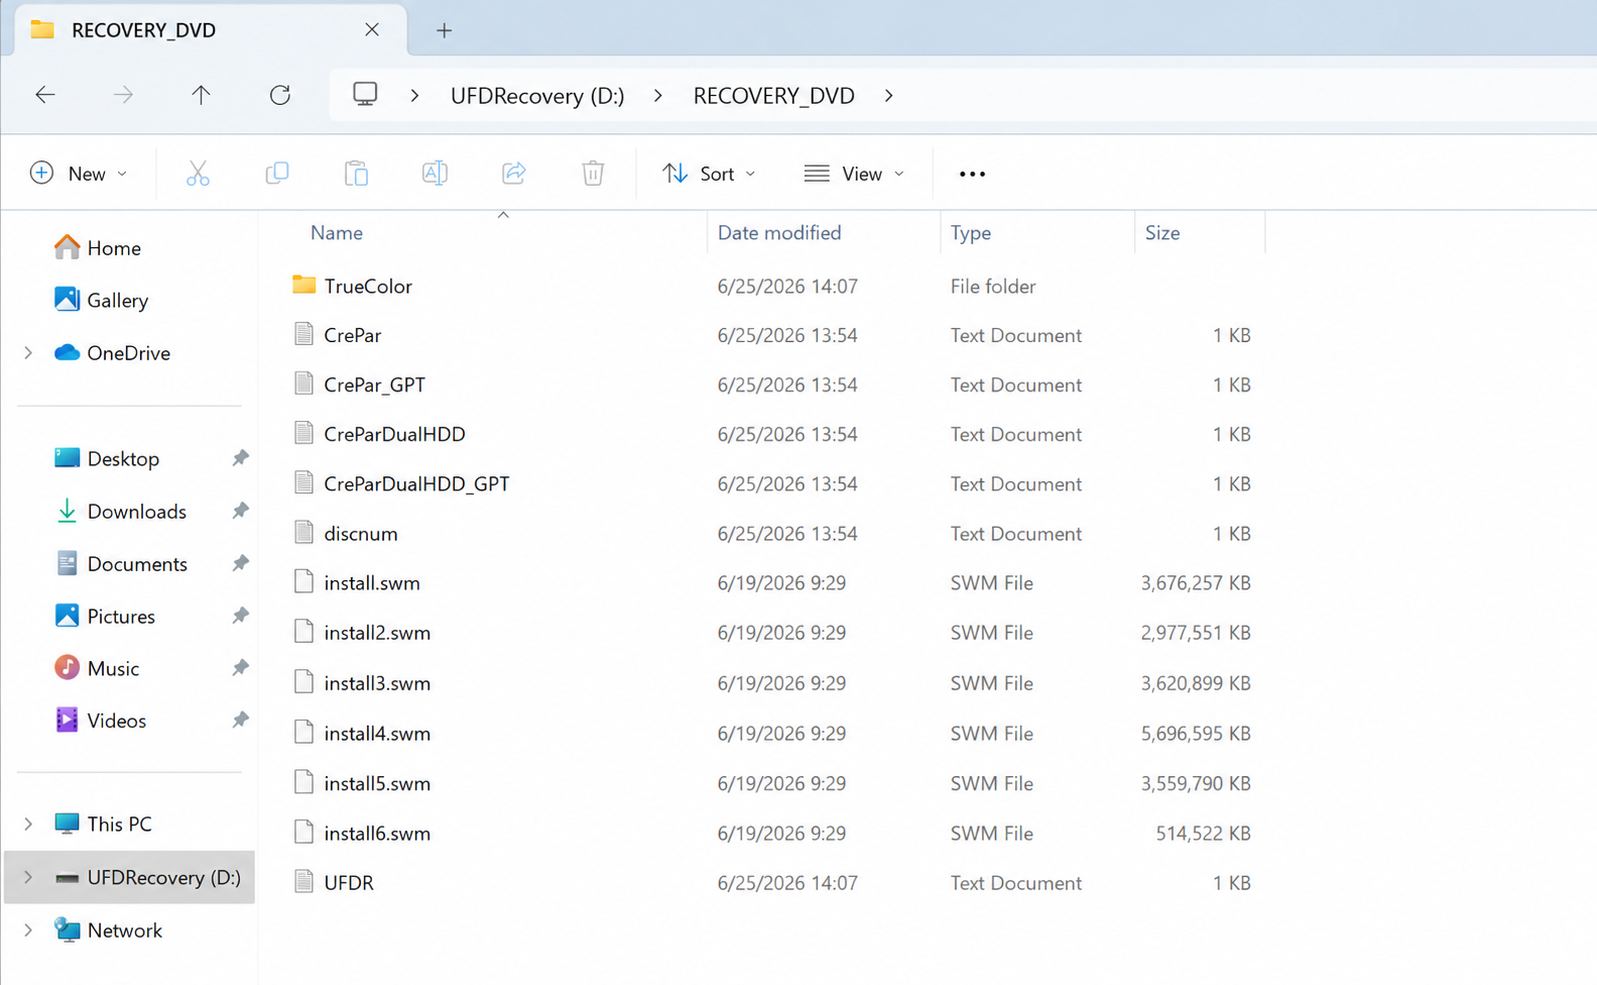
1.Open the UFDRecovery Disk\RECOVERY_DVD folder and verify that the .swm files have been generated in the correct sequence, such as install.swm, install02.swm, install03.swm, and so on. If any files are missing, refer to [How To] Clean Install MSI Dragon Center/Creator Center (UWP), reinstall the latest version of MSI Dragon Center or MSI Creator Center, and then recreate the system recovery media.
Note: The number of 'install.swm 'files varies depending on the size of the system recovery image.
Successful:
Failed:
.png)
Ⅲ.Restore the Windows System Using Recovery Media
1.Insert the system recovery DVD or USB recovery drive into your laptop.
2.Restart the laptop.
3.Press the shortcut key [F11] during POST (Power-On Self-Test).
4.Select boot from either [DVD Recovery disk] or [USB recovery drive], press Enter to confirm, then follow the on-screen prompts.
5.The main system recovery menu will appear.
.png)
6.[Hard Disk Recovery]: Restore the entire hard drive to factory default settings.
7.[System Partition Recovery]: Reset only the system partition to its factory preloaded state.
8.The power adapter must remain connected throughout the entire restoration process. Ensure the laptop is plugged in before proceeding to the next step.
9.System restoration will erase and format the hard drive. Back up all critical data in advance before starting the operation.
10.Complete the remaining restoration steps by following the on-screen instructions.
FAQ
Q: What is an MSI Recovery USB drive?
A: An MSI USB recovery drive contains the factory recovery image and can be used to quickly restore your laptop to its original factory settings if the system encounters a problem.
Q: Why should I create a USB recovery drive?
A: If your storage drive becomes damaged, the system fails to boot, or the recovery partition is lost, you can still use the USB recovery drive to restore your system.
Q: When is the best time to create it?
A: It is recommended to create a USB recovery drive immediately after completing the initial Windows setup. At this point, the system is in its original factory state and all recovery files are intact.
Q: What should I do if I lose my USB recovery drive?
A: Contact MSI Customer Support to check whether a replacement recovery image is available for your device.