BIOS Secure Erase (storage media sanitization)
This operation explains how to perform secure erase on a storage media within the BIOS, restoring the storage media to its factory state or completely wiping its data. Each step is clearly described, along with warnings and prerequisites to ensure safe operation. The Secure Erase procedure applies to all types of storage media, including HDDs, SSDs, soldered-down UFS, and/or soldered-down eMMC found in the product.
The Secure Erase function complies with the guideline NIST SP 800-88 or IEEE 2883. It is designed to provide standardized, secure, and reliable data sanitization methods.
Note: The Secure Erase function in MSI BIOS permanently removes all data on the selected storage media (including the operating system if it is the system disk). The BIOS Secure Erase function is pre-installed in the BIOS. Backup is required before proceeding.
Prerequisites (Read Before Use)
Applicable Products: Notebook, Desktop, All-in-One PC
- Backup all important dataSecure Erase will irreversibly delete everything, including OS and partition tables.
- Check storage media compatibilitySome storages (particularly certain NVMe drives or drives in RAID mode) may not be supported by BIOS Secure Erase. Running the command on unsupported drives could render them unusable.
- BIOS settingsOn some MSI systems, SATA mode must be set to AHCI for Secure Erase to function.
- If erasing the system diskBIOS may require a reboot into a dedicated erase utility environment before execution. Be prepared with bootable installation media for reinstalling the OS afterward.
Checklist Before Running Secure Erase
- All important data fully backed up.
- Storage media model and firmware verified for compatibility.
- BIOS updated to the latest version.
- Bootable OS installation media prepared (if wiping system disk).
- Device connected to stable power supply (do not rely solely on low battery).
Safety Warnings
- Do not proceed without confirming the storage media and completing a backup.
- If unsure whether your storage media supports BIOS-level Secure Erase, consult the storage media manufacturer’s documentation or use the vendor’s secure erase tool (e.g., Samsung Magician).
Step-by-Step Procedure
1. Enter BIOS → Locate Security Menu → Select Secure Erase
- Boot or restart the MSI notebook/PC.
- At the MSI logo screen, press the BIOS entry key (Delete, or as specified for your model) to access UEFI/Advanced Mode.
- Navigate to the Security tab and select Secure Erase.
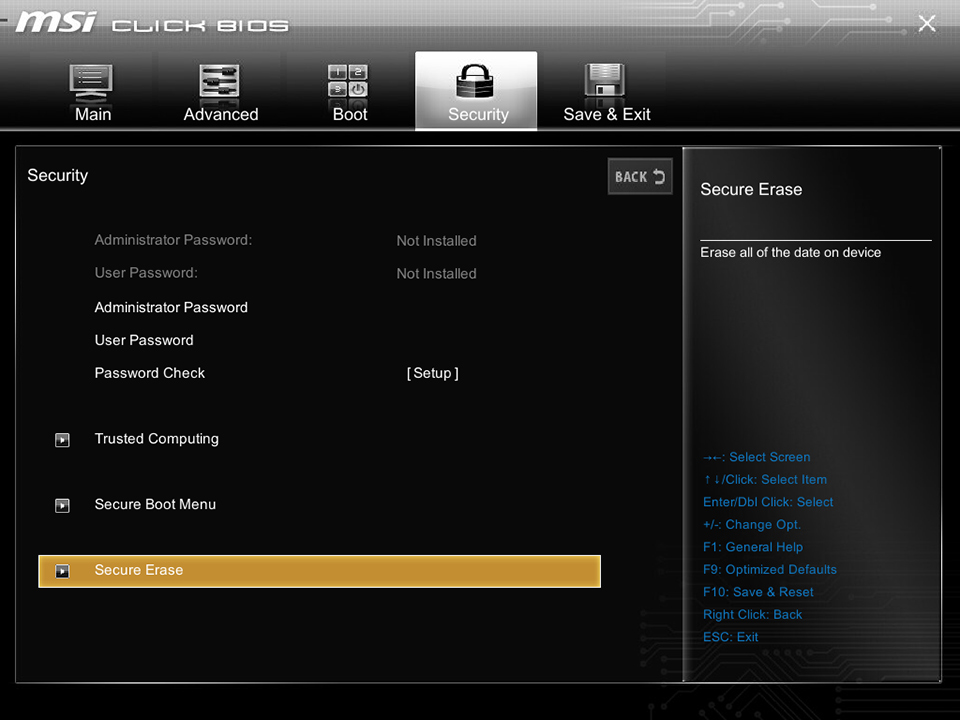
Note: If Secure Erase is not visible, update to the latest BIOS version.
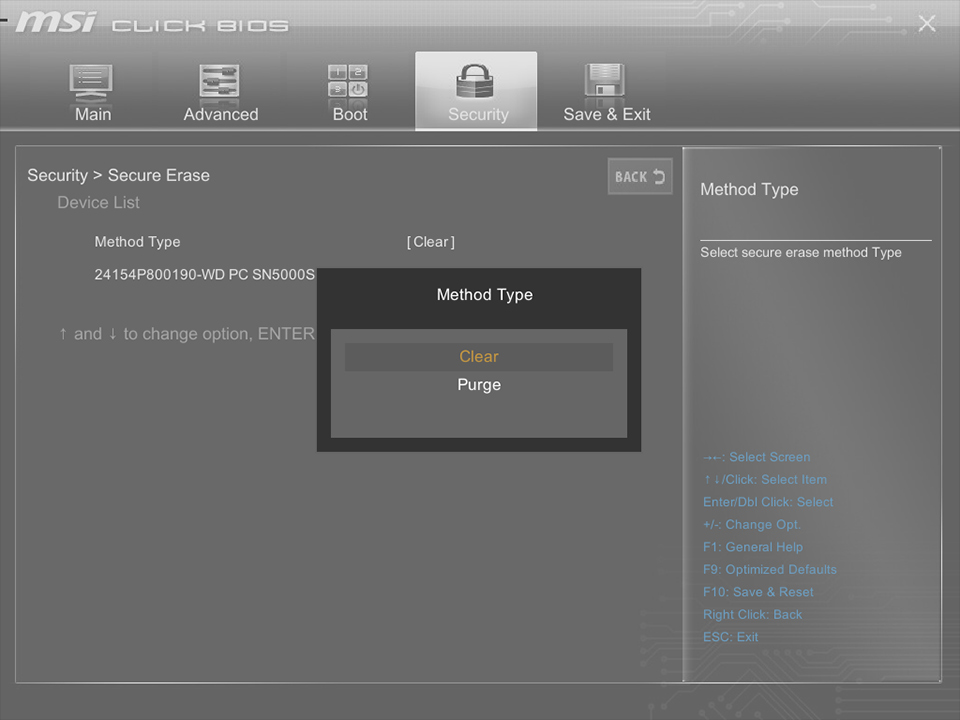
2. Choose Method Type: Clear or Purge
- Inside the Secure Erase menu, a Method Type selection will appear. Options generally include Clear and Purge.
- Clear: Usually performs a quick overwrite or reset suitable for restoring drive performance.
- Purge: Performs a deeper, more thorough erasure (e.g., cryptographic erase, sanitize), recommended when permanent data destruction is required.
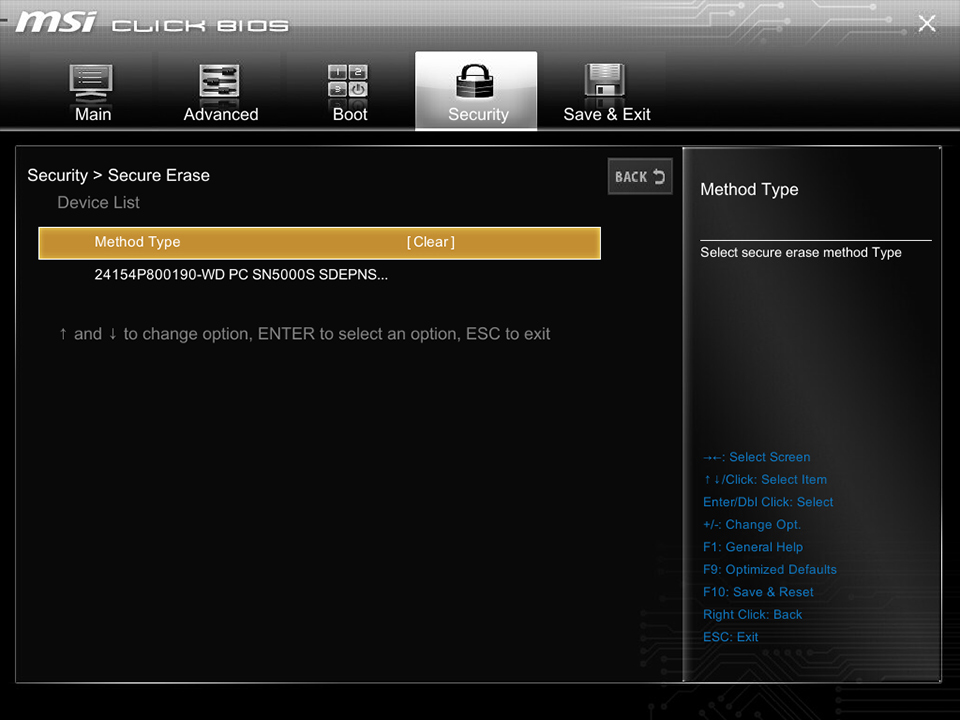
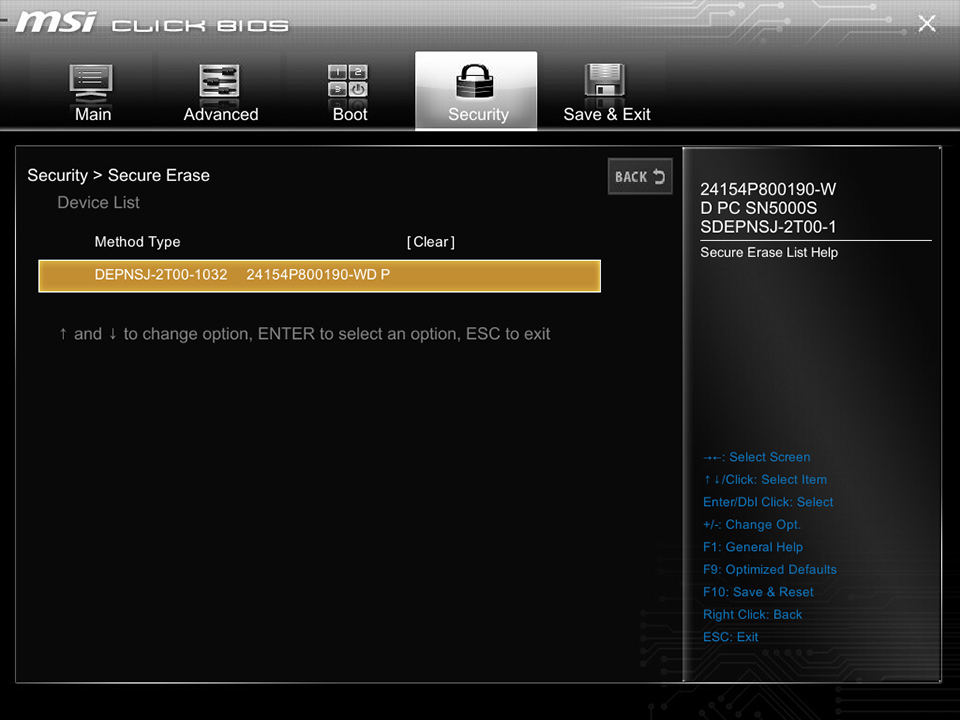
3. Select the Storage media
- After selecting the erase method, BIOS will display a list of available drives.
- Carefully check the drive model and capacity to ensure you select the correct target.
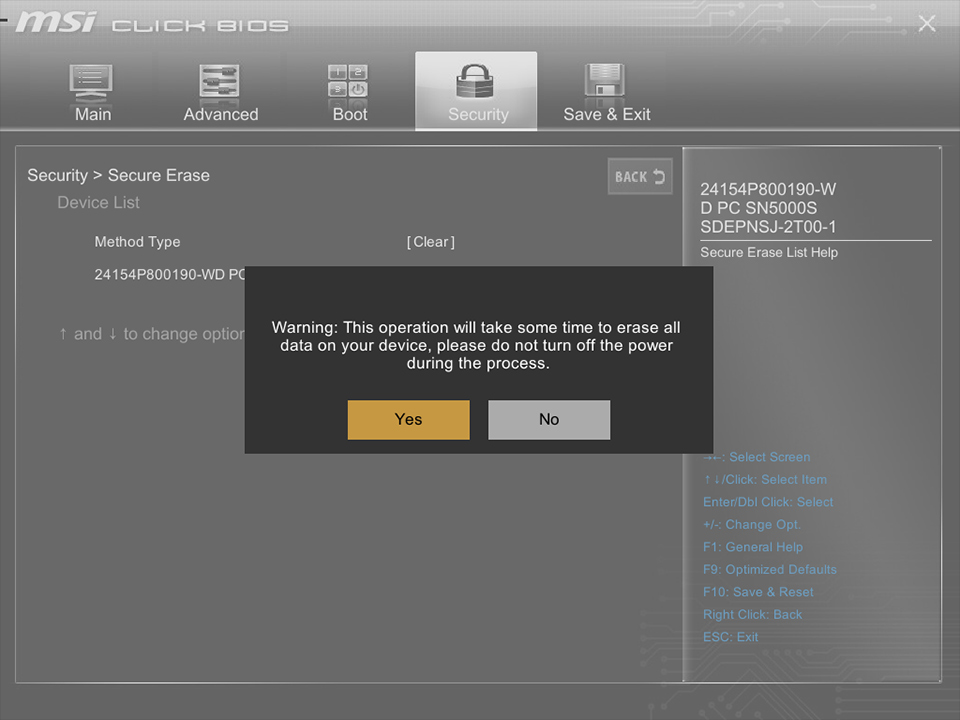
4. Confirm Warning Message → Select Yes → Start Erase Process
- A confirmation dialog will warn that all data will be permanently deleted.
- Read the prompts carefully.
- Select Yes to begin.
- For system disks, BIOS may restart automatically into the erase tool environment.
- Time required: The process may take from several minutes to hours depending on storage media type, capacity, and method (Clear vs. Purge). Do not power off or interrupt during this stage.
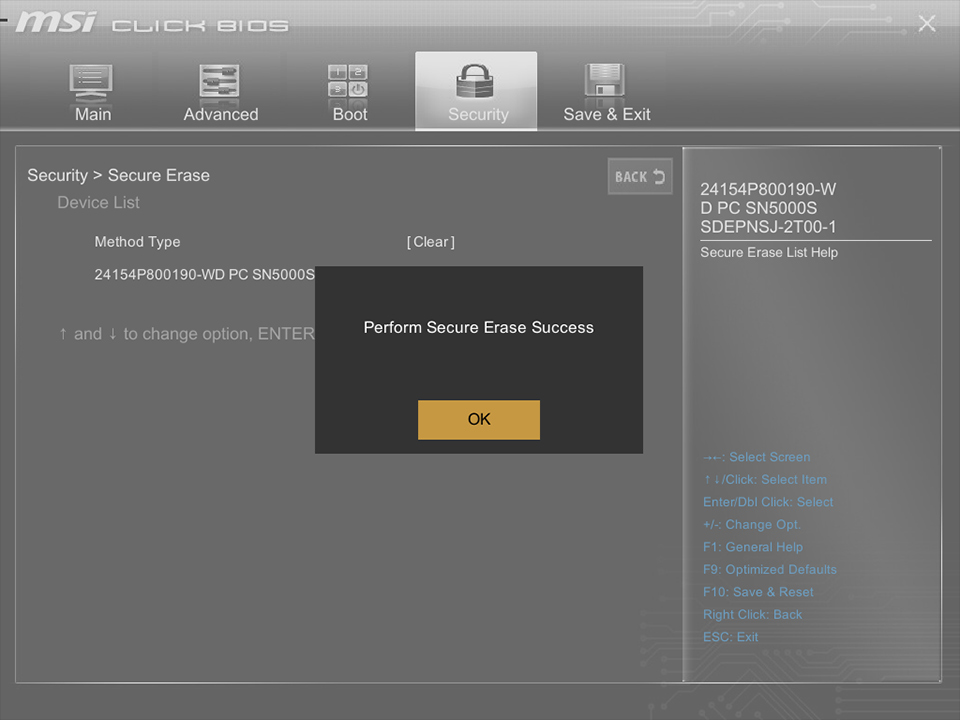
5. Completion: Verify Successful Erase
- Once finished, BIOS will display a message such as “Perform Secure Erase Success.”
- If errors occur, note the error code and refer to MSI support or the storage media manufacturer’s documentation.
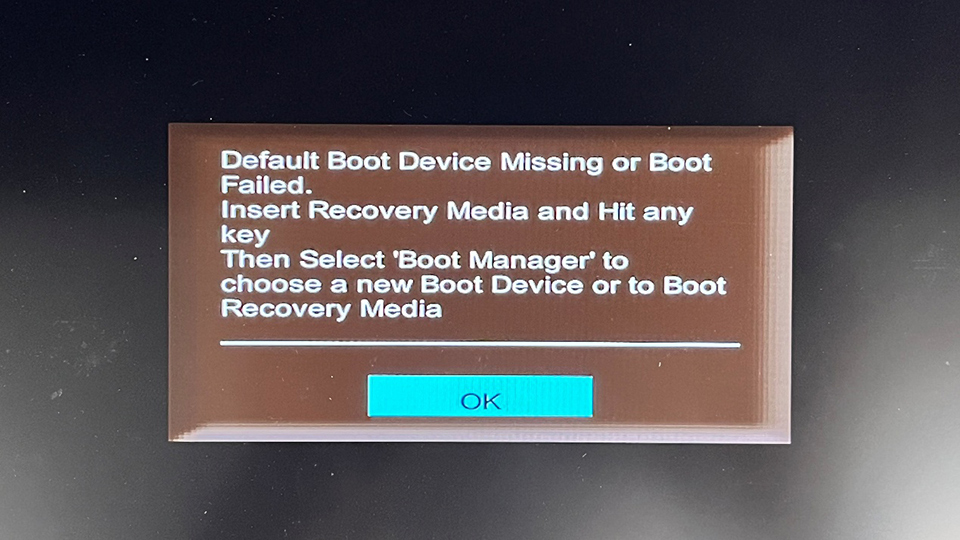
6. Reboot System → Storage Media Will No Longer Contain an Operating System
- If the erased drive was the system disk, the PC will not boot into any OS. A bootable installation medium (e.g., Windows USB installer) is required to reinstall the OS.
- For non-system disks, reinitialize and reformat the storage media before reuse.