What to do when hard drive is not recognized in BIOS
A computer is composed of software and hardware, software includes: operating system, software applications, drivers…etc. The hardware includes: chassis, power supply, hard drive, memory, motherboard, CPU - Central Processing Unit, CD-ROM, sound card, network card, graphics card…etc.
A computer requires an operating system to run and which the operating system is installed in a hard drive. When the hard drive is not being detected then operating system will not be loaded and therefore the computer won’t operate normally. What to do when this issue occurs?
Common Hard Drive Types
There are two main types of hard drives on the market today grouped by interfaces below:
SATA variants
1. 3.5 inch HDD. (mechanical Hard Disk Drive (HDD)
2. 2.5 inch HDD/SSD. [mechanical Hard Disk Drive(HDD) and Solid-State Drive (SSD)].
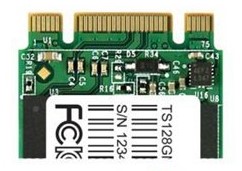
M.2 variants
1. M.2 PCIe
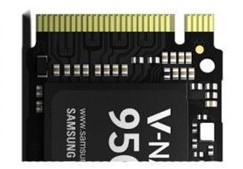
2. M.2 SATA
What to do when the hard drive is not recognized in BIOS
Please download the BIOS file from MSI official website according to your notebook model.
- Check if the hard drive is installed properly
- Check the HDD compatibility list of the motherboard
- Motherboard BIOS Update
Check if the hard drive is installed properly
Please check if the SATA data cable and power cable are connected properly.

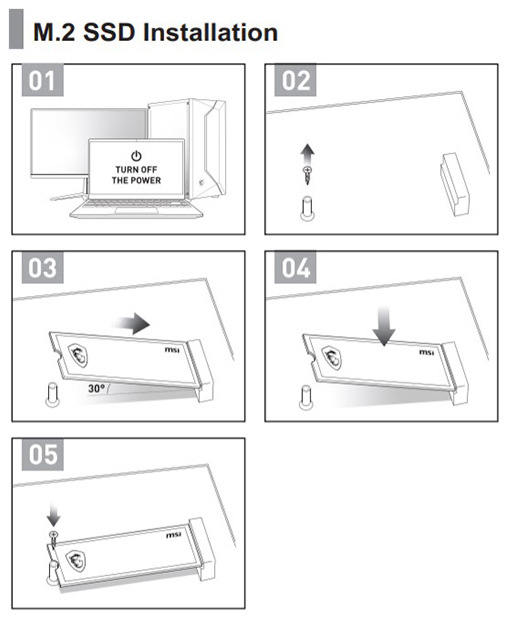
For M.2 interface SSD, please remove the hard drive, reinstall it, and lock the screws, then turn it on again to check if the M.2 SSD is recognized properly.
If conditions allow, check the hard drive in another computer to ensure that the hard drive itself is not faulty.
Check the HDD compatibility list of the motherboard
There may also be compatibility issues between the hard drive and the motherboard, especially with M.2 hard drives. Please check the MSI website to see if the current hard drive is supported.
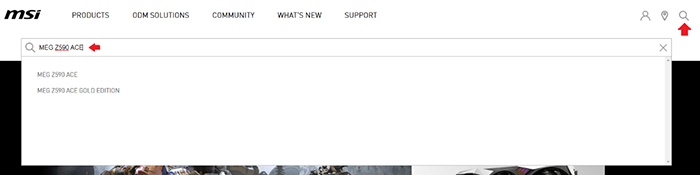
Click the magnifier icon on the top-right hand corner of MSI website and insert 「MEG Z590 ACE」as an example.
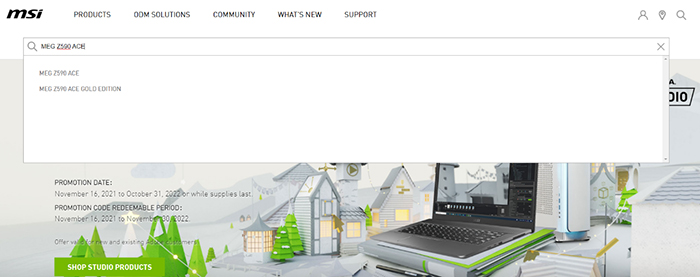
Search for 「MEG Z590 ACE」, and click on “specification”.

Check for supported storage device interfaces
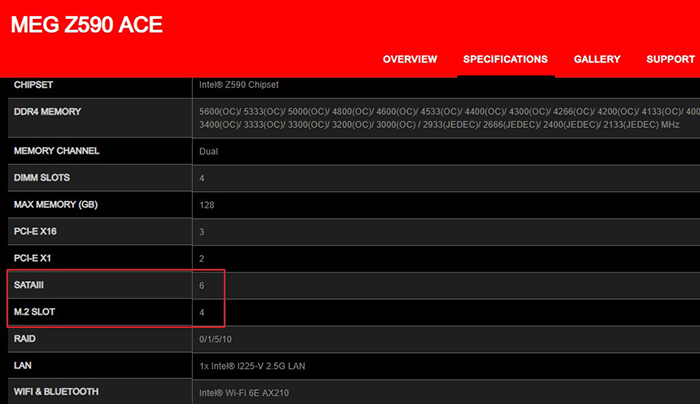
Note: M.2 slot may share the same resource with SATA port, in such case if one is being occupied another will get disabled. Please check user manual of your motherboard model for more details.
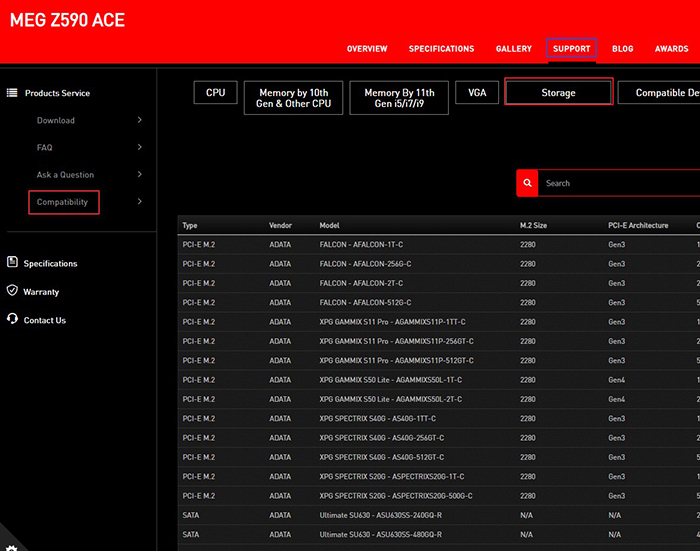
Check HDD compatibility list of your motherboard
As shown in the picture below, please click on “Support” > “Compatibility” > “Storage” for the Storage device compatibility list.
Motherboard BIOS Update
Download the official MSI BIOS file
Click on the "Magnifying Glass" icon on the top right corner of MSI website.
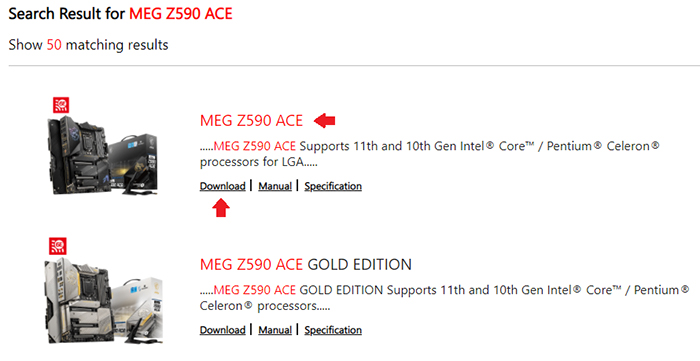
For example: MEG Z590 ACE, enter "MEG Z590 ACE" and press the "Enter button" to search.
Find "MEG Z590 ACE" and click on "Download”.
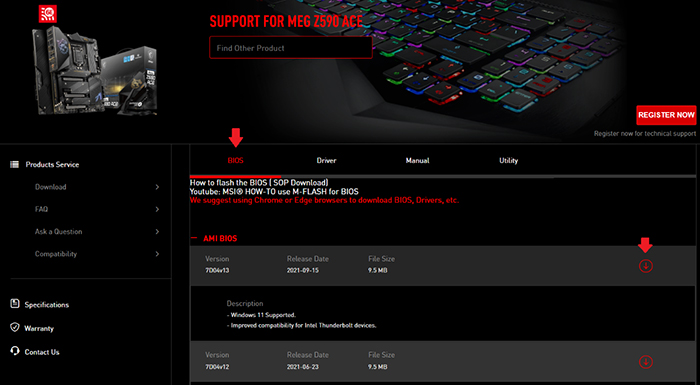
Always download and apply the latest official release BIOS version.
After downloading is complete, please follow the steps below to update the BIOS by using M-FLASH function in the BIOS Menu.
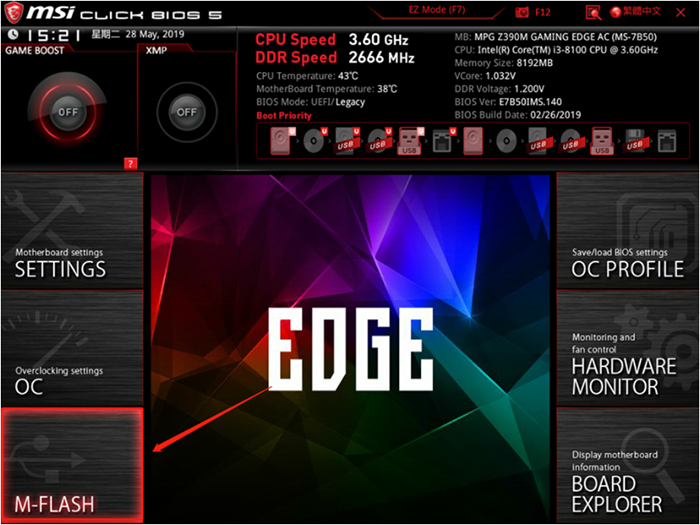
(Take MPG Z390M GAMING EDGE AC motherboard as an example)
1. USB flash drive
2. BIOS file
Format the USB flash drive in FAT32 file system type.
Note: By formatting the USB flash drive, it will erase all the data so please do backup the data before proceeding
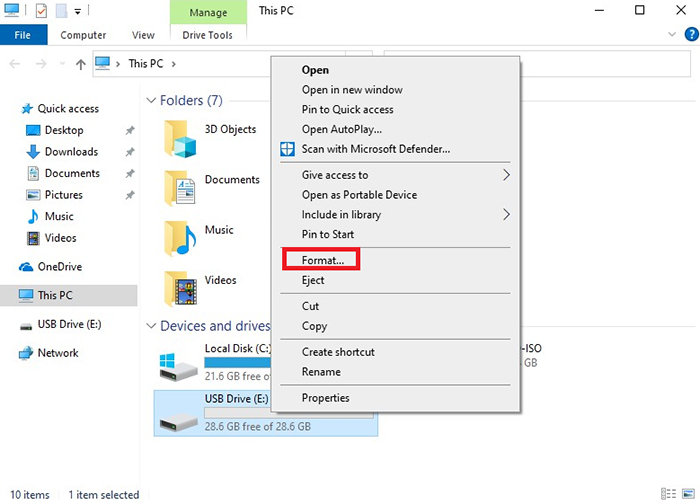
1. Plug in the USB, right-click on the USB drive and select "Format".
2. Select "FAT32 (default)" as shown below→ select "Start".
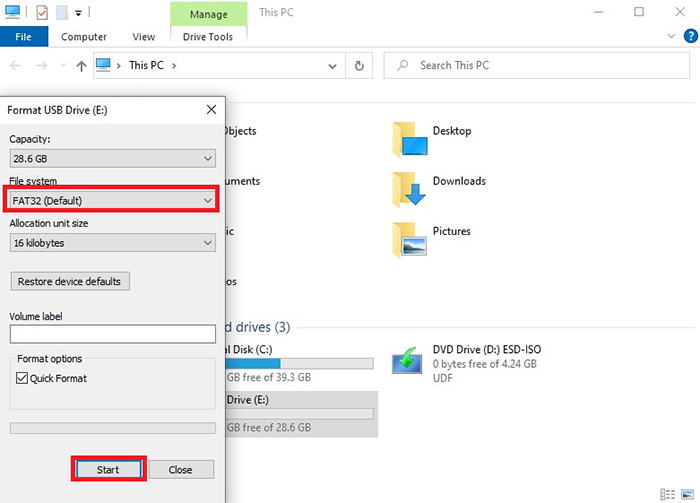
3. Format complete.
Update BIOS
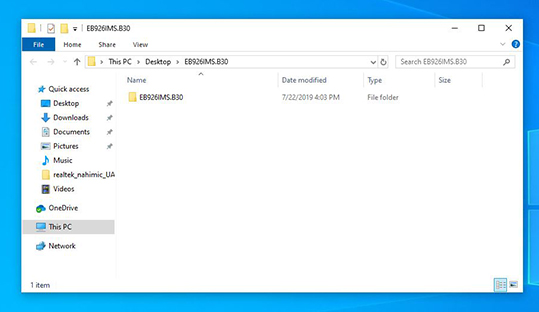
1. Right-click on the downloaded BIOS file and select "Unzip File".
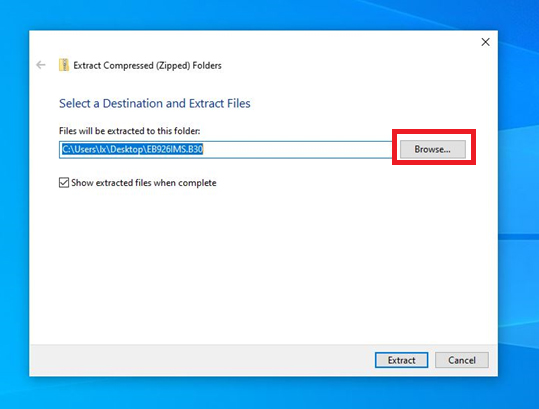
2. Copy the file to the directory of the USB flash drive.
Note: To prevent the file not being able to be detected, please do not place it under any other folder.
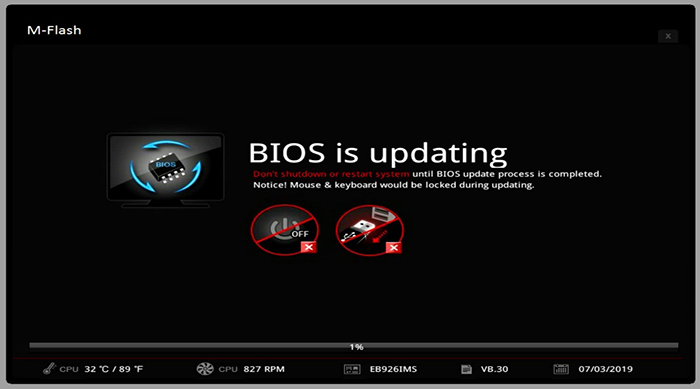
When entering the boot screen, press the "Delete" key continuously to enter the BIOS Menu and select "M-FLASH".
1. Select "Yes" and enter the M-FLASH interface.

2. Click on the USB flash drive you just created and click on the BIOS file folder.

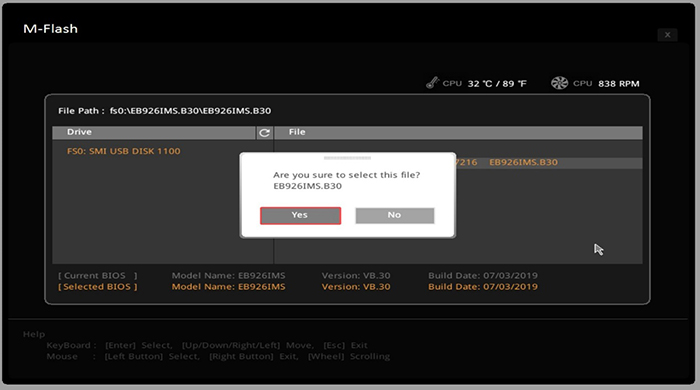
3. Click on the BIOS file and press the "Enter" button.
4. Select "Yes" to perform BIOS update.
Note: Do not power off the device during the BIOS update process, and do not unplug the USB flash drive, as BIOS update failure may cause the computer fail to boot.
5. When the progress bar reaches 100%, the computer will automatically reboot and the BIOS will be updated. Check again if the hard drive is being detected after the update.