


[Motherboard] Wake on LAN Settings
Wake on LAN allows a computer that has entered sleep or shutdown state to be awakened and enter working state through the network.
To enable Wake on LAN, the motherboard and operating system need to be configured as follows:
BIOS Settings
Note: The BIOS interface may vary depending on the model.
1. After powering on the computer, immediately press and hold the "DELETE" key until the BIOS setup screen appears. Then, use the mouse to select "Advanced".

2. Click on "SETTINGS", then select "Advanced".

3. Select "Power Management Setup".

4. In the "ErP Ready" section, select "Disabled".
Note: On some motherboards, this may appear as "EuP 2013"; set it to Disabled as well.

5. Next, go back to "SETTINGS" → "Advanced", and click "Wake Up Event Setup".

6. Then click "Resume By PCI-E/Networking Device".

7. Change "Disabled" to "Enabled".

8. Press "F10" on the keyboard, select "Yes," and then the computer will restart and enter the operating system.

System Settings
1. Right-click on the Start button on the desktop, then select "Device Manager".

2. Click "Network adapters", double-click your wireless network card, then click "Power Management". Check the box for "Allow the device to wake the computer", then click "OK".
Note: The name of the wireless network card may vary depending on the model of the computer.

3. Ensure that Windows Fast Startup is disabled. In the Windows Start menu, type "Control Panel" in the search bar and open it.

4. Click on "Hardware and Sound".

5. In "Power Options", click "Change what the power buttons do".

6. Select "Change settings that are currently unavailable".

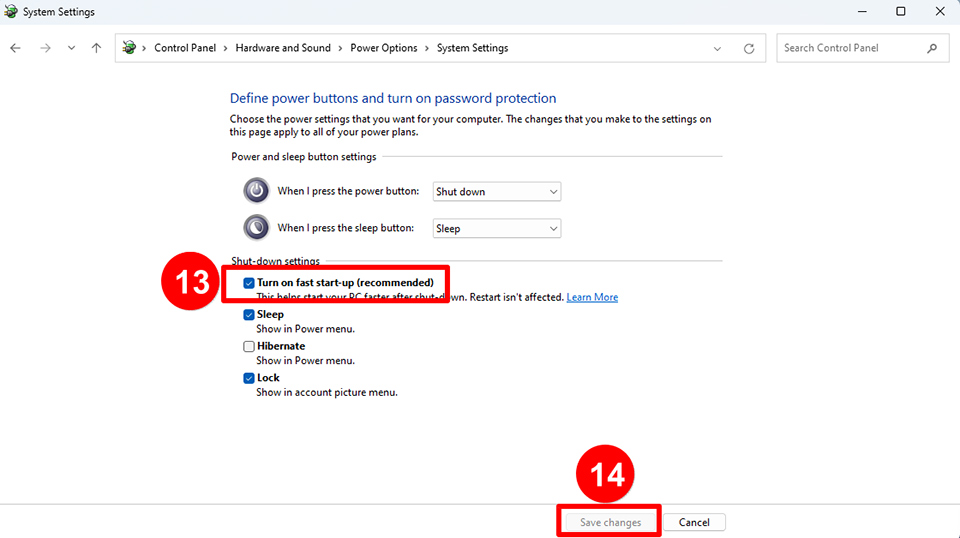
7. Uncheck "Turn on fast start-up (recommended)", then click "Save changes".