AI HMI Walkthrough from Setup to Advanced Features
Desktops
In today's fast-paced digital world, seamless interaction between users and machines is more important than ever. Advanced industries, including space exploration and electric vehicles, utilize touchscreens as control centers to provide intuitive user experiences. Inspired by this, MSI introduces AI HMI—an intuitive, feature-packed interface designed to enhance user experience and boost efficiency. Whether you're a gamer, a professional, a content creator, or a multitasking enthusiast, AI HMI simplifies control and customization like never before. Let’s dive into its features and setup to see how you can make the most of this innovative technology.
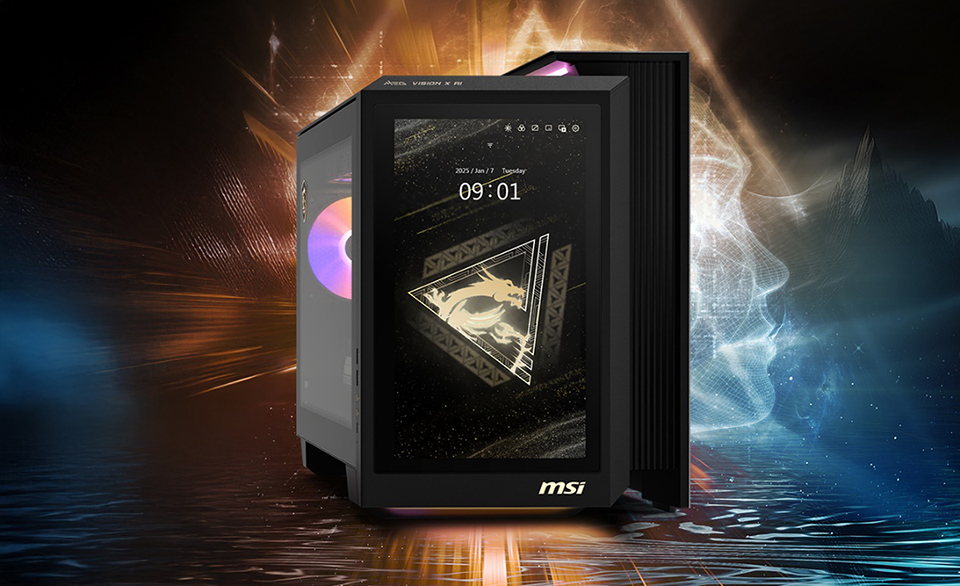
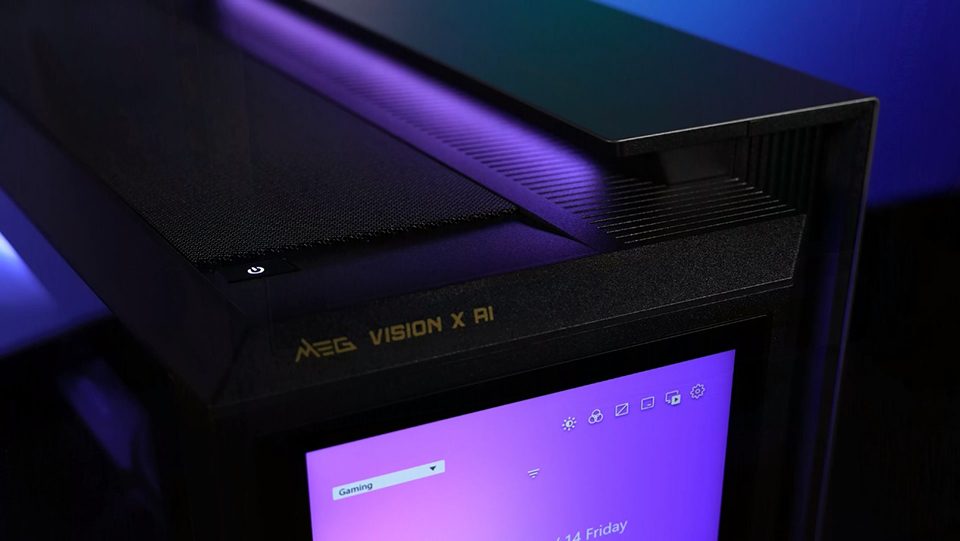
Experience intuitive control with AI HMI on MSI’s MEG Vision X AI
AI HMI Solution Overview
The AI HMI solution includes a 13-inch Full HD IPS touchscreen and a tailor-made AI HMI app, paired with a built-in speaker and dual microphones for enhanced interaction. This enables AI HMI to support the ever-growing ecosystem of AI applications, providing a rich and intuitive interface for seamless user engagement.
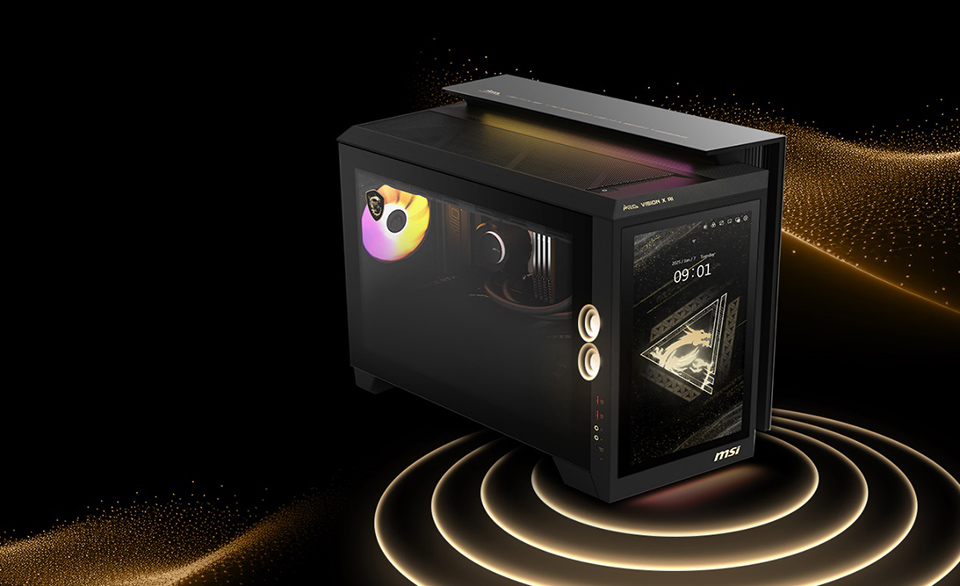
The AI HMI solution includes a built-in speaker, microphone, 13'' FHD touchscreen, and a tailor-made app.
Unlike competitors that require an HDMI connection to power their built-in panels, AI HMI is powered by an integrated GPU, freeing up VGA video output ports for external displays—giving it a clear edge over the competition.
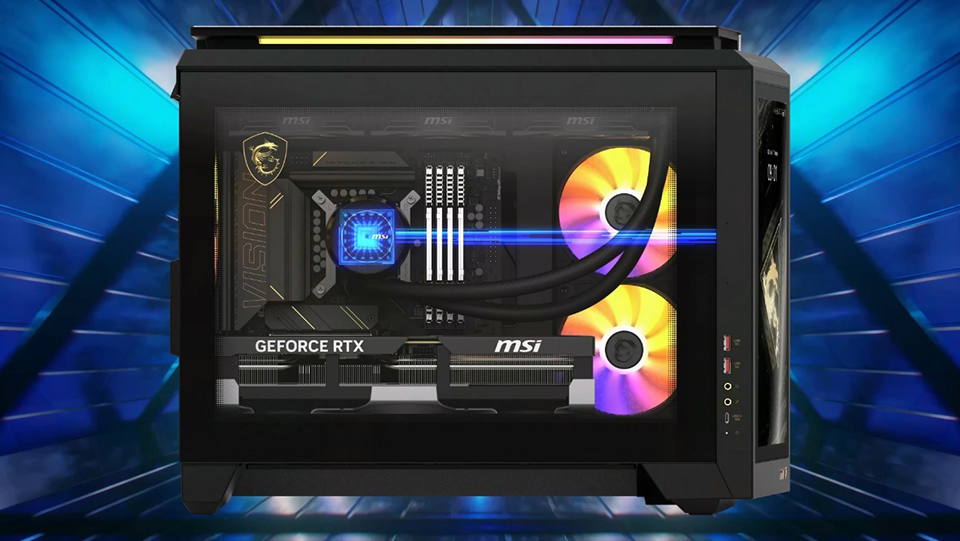
AI HMI uses the integrated GPU, allowing full use of the graphics card's video outputs.
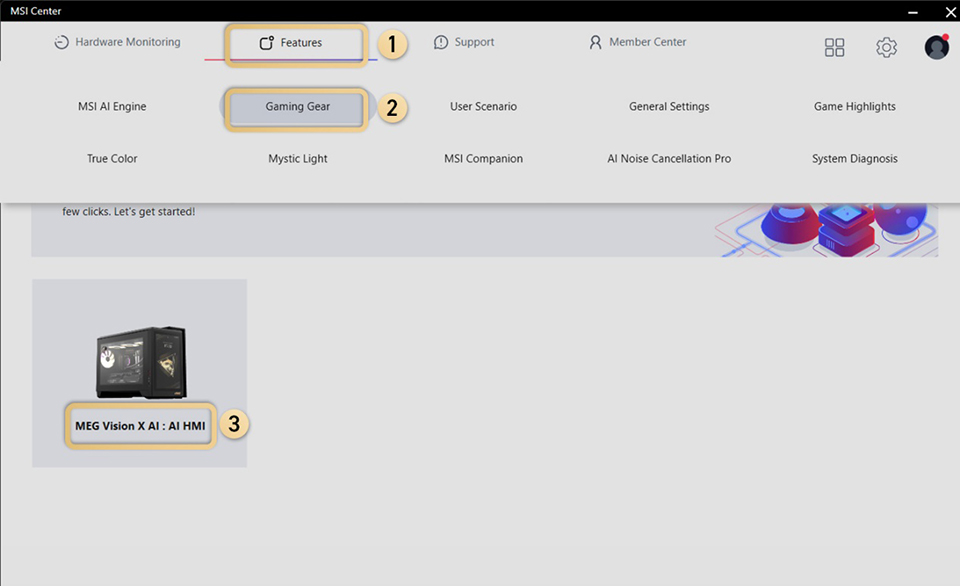
Let’s set up AI HMI to get started!
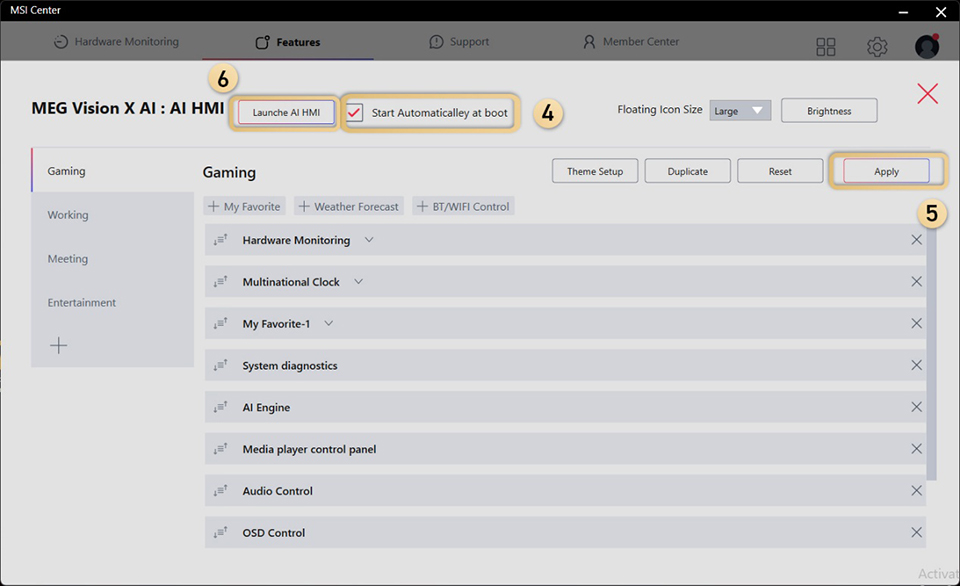
Setting up AI HMI is a breeze. To begin, navigate to Gaming Gear in MSI Center and enable the Auto-startup option. This ensures AI HMI launches automatically each time you power on your PC. Once enabled, simply click Launch AI HMI, and you're ready to explore its capabilities.
Navigating AI HMI: Essential Features
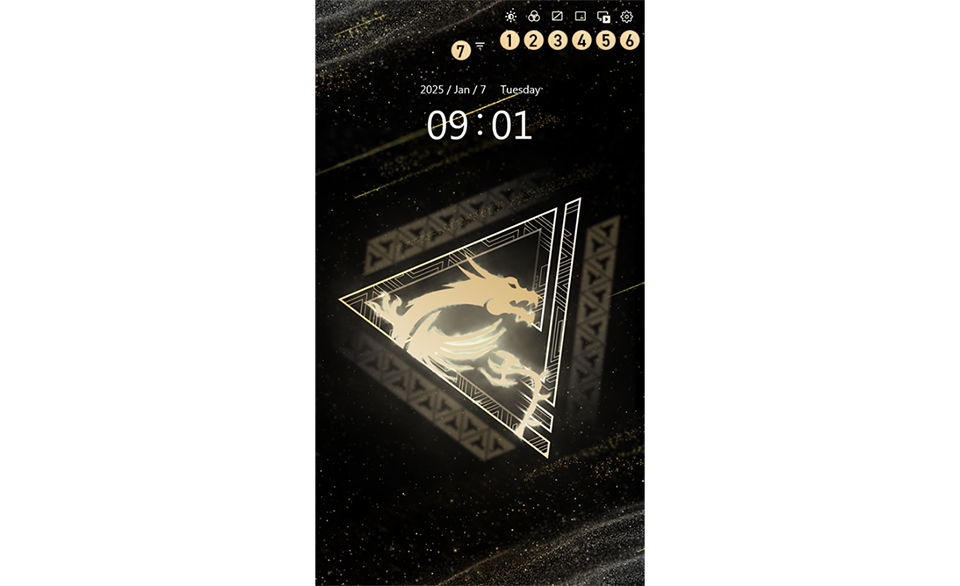
The AI HMI interface is designed with 6 easy-to-use touch controls:
1. Brightness Control – Adjust AI HMI touchscreen brightness with a simple tap and slider.
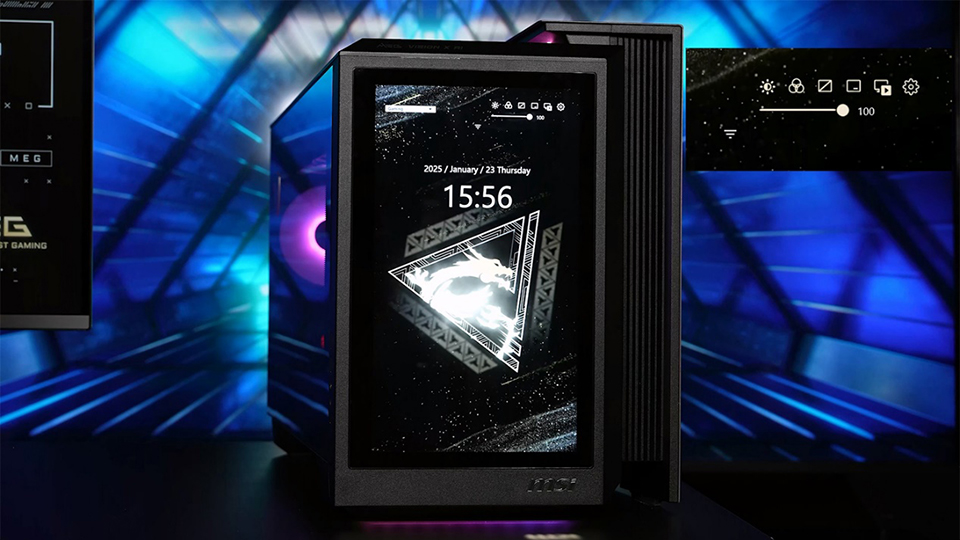
Use the slider to adjust the brightness of the AI HMI touchscreen to your preference.
2. RGB Lighting Control – Turn your VISION system’s RGB lighting on or off instantly.
3. Screen Backlight Switch – Disable the AI HMI touchscreen with a tap and bring it back just as easily with another tap.
4. AI HMI Minimize Button– Minimize AI HMI and restore it via a floating icon.
3. Screen Backlight Switch – Disable the AI HMI touchscreen with a tap and bring it back just as easily with another tap.
4. AI HMI Minimize Button– Minimize AI HMI and restore it via a floating icon.
Tap the Gold-Black triangle floating icon, default on the top-left side, to bring AI HMI back onto the screen.
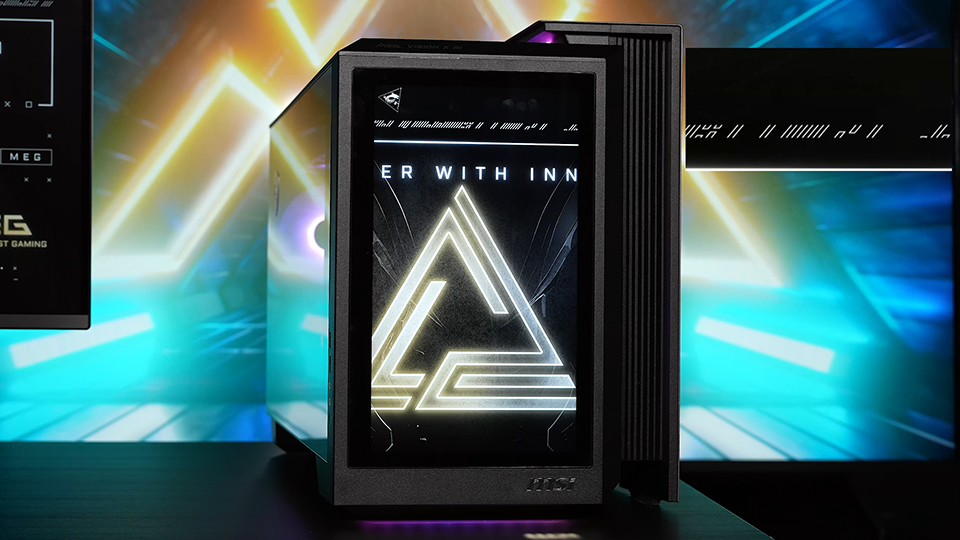
5. Animated Wallpaper Control – Start or stop animated wallpapers to match your style.
6. Advanced Customization – Personalize themes, colors, and wallpapers to make AI HMI truly yours.
6. Advanced Customization – Personalize themes, colors, and wallpapers to make AI HMI truly yours.
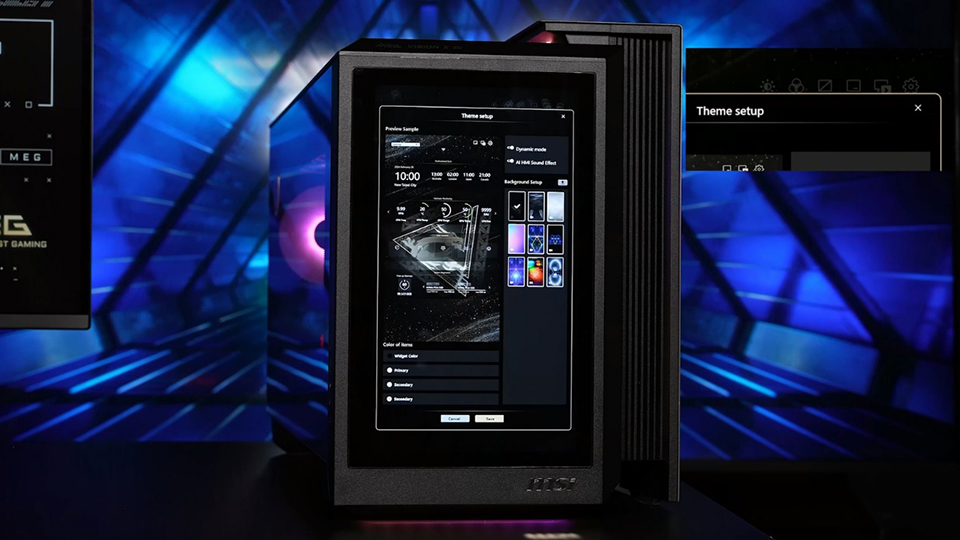
Tap the 6th icon to bring up the customization panel for more theme adjustments.
7. This icon allows you to view all widgets at a glance.
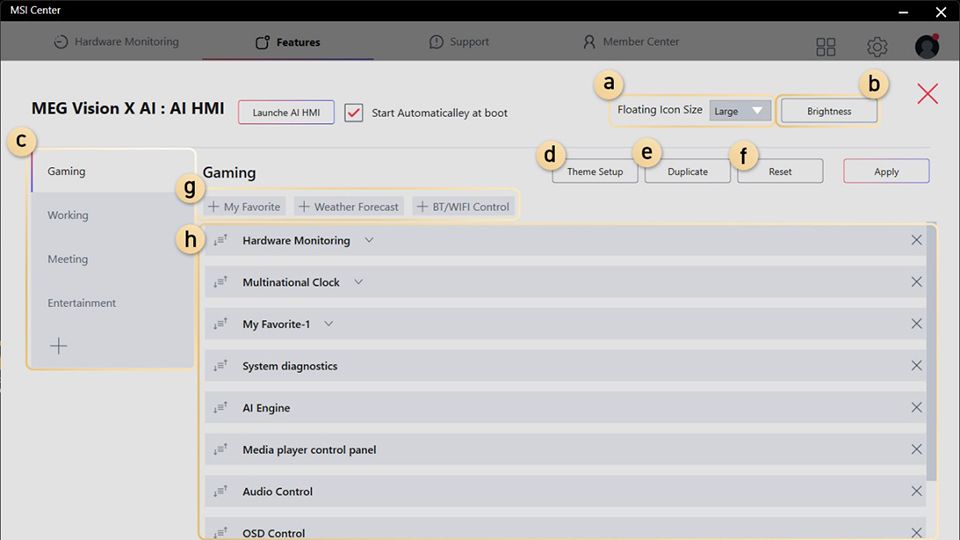
a. This button adjusts the Floating Icon size, offering three different options.
b. The Brightness button allows you to fine-tune the AI HMI touchscreen brightness.
c. This section displays the default profiles—four preset options are available, and you can create a new profile by clicking the “+” icon at the bottom.
d. Click this button to customize the appearance of AI HMI.
e. Duplicate an existing profile to create a new one.
f. Click this button to reset the selected profile to its default settings.
g. After clicking “+”, the selected function will be added as a widget to the AI HMI touchscreen.
h. This section displays the widgets within the selected profile. A “V” icon next to a function indicates the availability of advanced settings.
4 Default Modes for Any Scenario
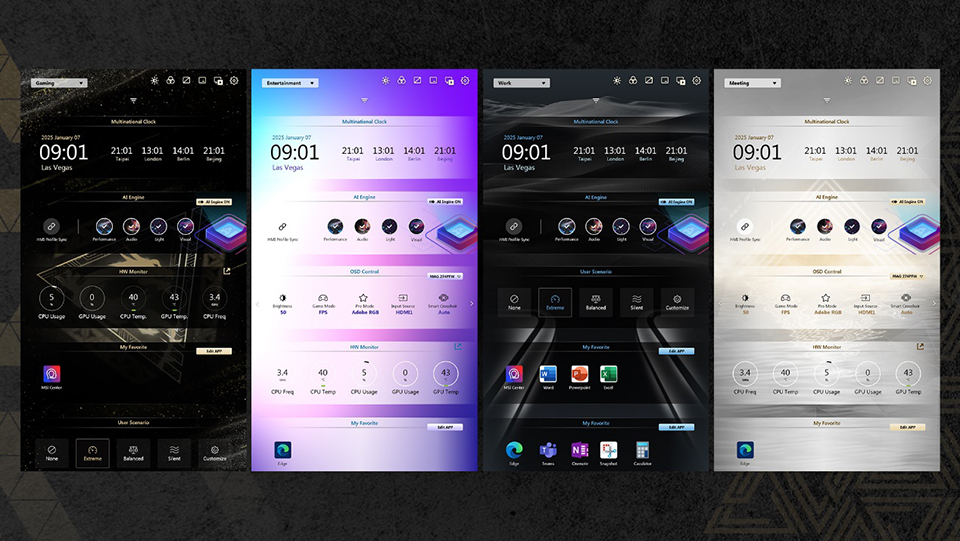
AI HMI offers four default modes, each optimized for different tasks. It is highly intuitive—automatically detecting active applications and seamlessly switching between modes to enhance your experience.
- Gaming Mode – Focused on performance tracking and in-game essentials.
- Entertainment Mode – Ideal for media playback and streaming media.
- Meeting Mode – Optimized for video calls and communication tools.
- Work Mode – Designed for productivity, with quick access to essential applications.
For example, when you open a productivity tool, AI HMI switches to Work Mode with a matching wallpaper and widget settings. The widgets also come with preset configurations tailored to each scenario.
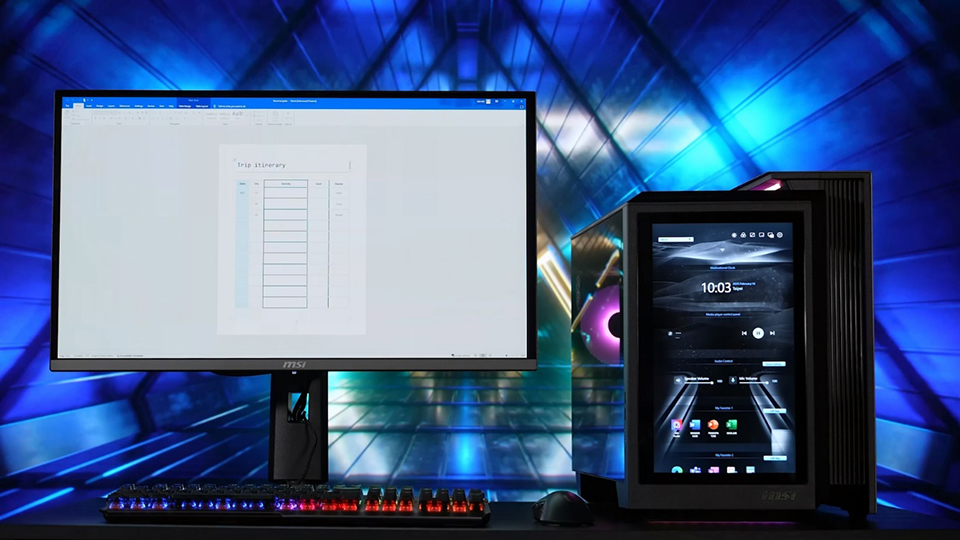
When you open a Word file, AI HMI automatically switches to Work Mode.
However, users can manually assign apps to specific modes or disable auto-switching for a consistent experience.
Enhanced MSI Monitor and System Control
One of AI HMI's main purposes is control—keeping everything under control. AI HMI isn’t just about aesthetics; it also enhances functionality. With the proper USB connections to an MSI gaming monitor, users gain access to OSD (On-Screen Display) controls, allowing for quick adjustments to brightness, color gamut settings, and more.
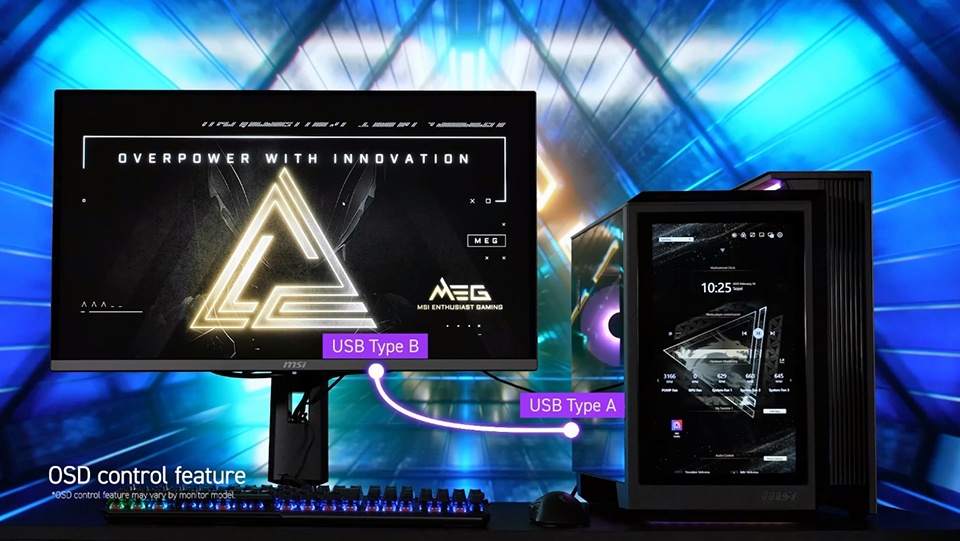
Connect a USB Type-A to the MEG Vision X AI and a USB Type-B to the MSI gaming monitor to operate the monitor functions
This feature is only supported on select MSI gaming monitors. The supported models are listed below.
MPG ARTYMIS 273CQRX-QD
Optix MPG321QRF-QD
Optix MPG321UR-QD
Optix MPG341QR
Optix MAG281URF
Optix MAG274QRX
Optix MPG321UR-QD Xbox Edition
MEG 342C OLED
MSI MAG322UPF
MSI MAG323UPF
MSI MAG274UPF
MAG 325CQRXF
MAG 275CQRXF
MAG 274QRF QD E2
MAG 341CQP QD-OLED
MPG 491CQP QD-OLED
MPG 271QRX QD-OLED
MPG 321URX QD-OLED
MEG 321URX QD-OLED
MPG 274URF QD
MAG 274QRF QD E2 MONSTER HUNTER
Modern MD272UPUG
PRO MP275QPDG
MPG 341CQPX QD-OLED
MAG 325CQRF QD E2
MAG 275CQRF QD E2
MPG 325CQRXF
MPG 275CQRXF
MPG 491CQPX QD-OLED
MPG 322URX QD-OLED
MPG 272URX QD-OLED
MPG 321CURX QD-OLED
MAG 322URDF E16
MAG 272URDF E16
MPG 346CQRF X24
MPG 321URXW QD-OLED
MPG 271QR QD-OLED X50
MPG 242R X60N
MPG 274URDFW E16M
-
List of supported models for OSD control function.
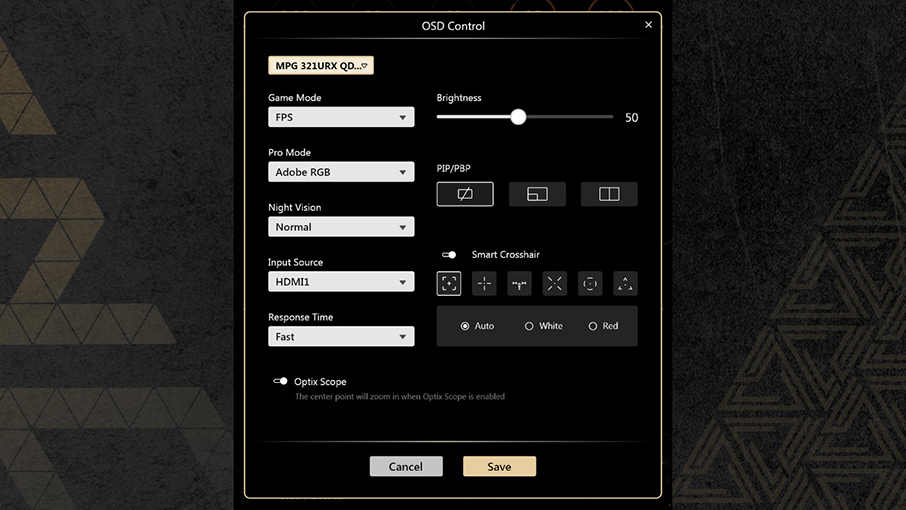
Here is the OSD control UI on AI HMI, but the available functions vary by monitor model.
For hardware enthusiasts, AI HMI also provides real-time system monitoring without the need for third-party apps. Expand the system info panel to track essential hardware stats, and customize which details are displayed via MSI Center.
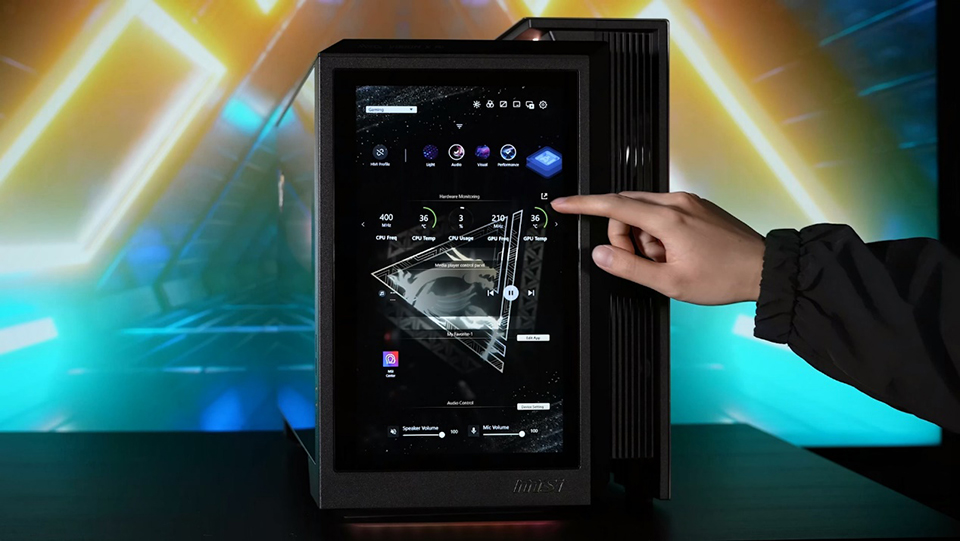
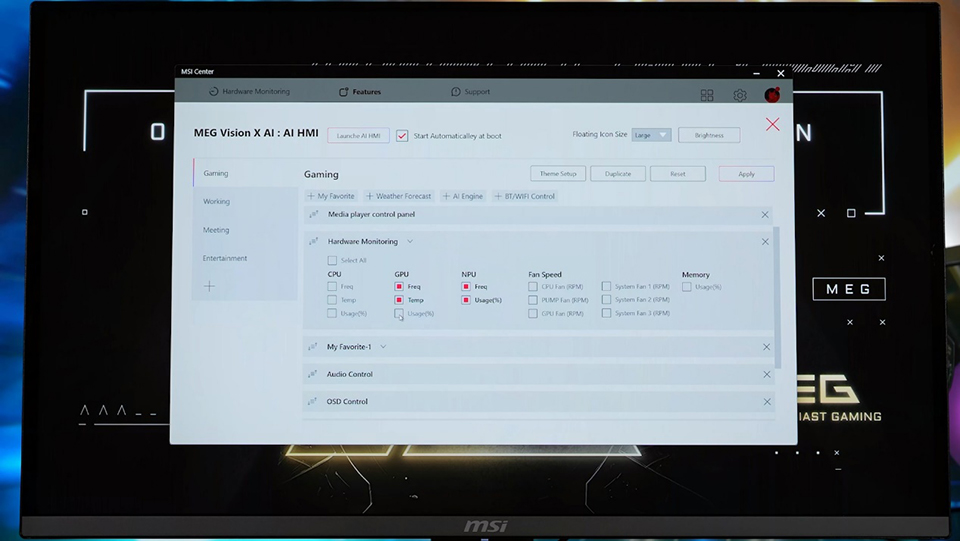
In MSI Center, you can select which hardware details to show on AI HMI.
AI HMI as a Secondary Display
AI HMI can function as a second display, making it perfect for multitasking. Simply drag windows onto the screen to monitor real-time data, social feeds, or additional applications while staying focused on your main monitor.
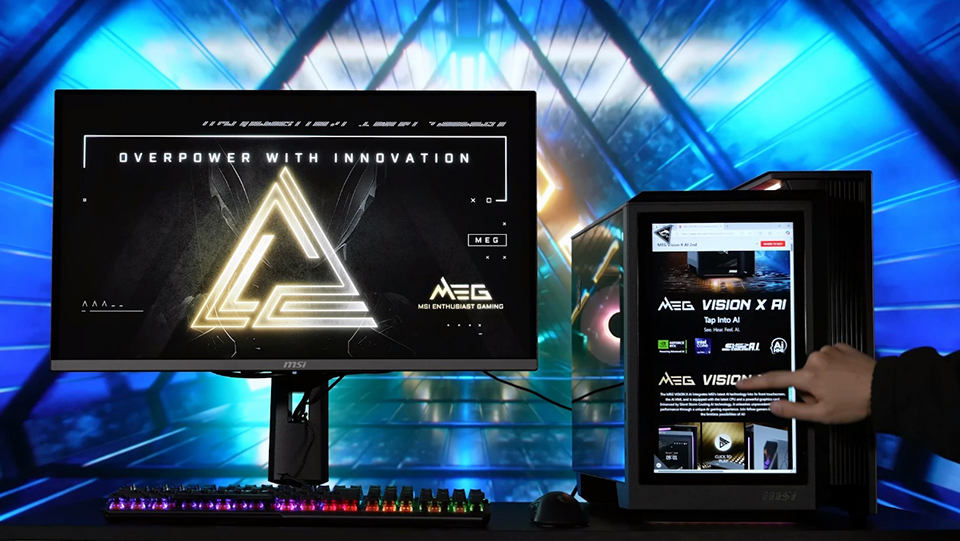
The browser has already moved to AI HMI and can be operated by touch.
One-Click App Launch for Instant Accessy
AI HMI also supports one-click software launching. By adding apps to the Favorite widget in MSI Center, users can instantly open frequently used programs with a tap.
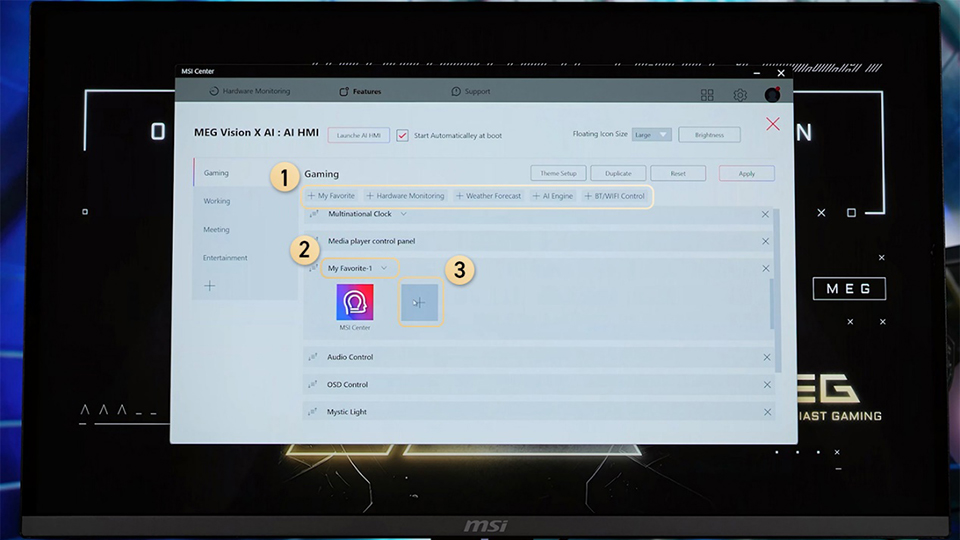
Follow the steps above to add a new app to My Favorite for one-click launch. However, only .exe and .html files can be added.
Deep Customization for AI HMI to Showcase Personal Style
To further personalize the experience, users can upload custom wallpapers and animated backgrounds. Whether using images or videos, AI HMI allows full customization. For those who love RGB synchronization, enable 'HMI Glow Sync' in the Mystic Light widget to seamlessly match the surrounding RGB lighting with the AI HMI wallpaper.
MEG Vision X AI's RGB lighting seamlessly syncs with the AI HMI wallpaper, creating an immersive experience.
Learn more:
Product page: https://msi.gm/megvisionxai2nd
AI HMI manual: https://msi.gm/S815DA07
AI HMI tutorial: https://youtu.be/dj-MBVFCuQ4?si=dC2GuW1bAGRjejUA
Product page: https://msi.gm/megvisionxai2nd
AI HMI manual: https://msi.gm/S815DA07
AI HMI tutorial: https://youtu.be/dj-MBVFCuQ4?si=dC2GuW1bAGRjejUA

Do you have trouble choosing a gaming desktop and monitor for your gaming needs? Don't worry! MSI has launched a tool that can help you select the best gaming setup. Simply input your preferred game, and it will suggest the optimal combinations. Please click on the "Which game do you like?" banner to visit the website for more details.