How can I run Stable Diffusion on MEG Trident X2 and MPG Infinite X2?
Desktops

AI GC has already become a hot topic last year. Especially, Generate AI is the biggest topic in AI GC discussion. Many services and applications are based on the Generate AI technique to publish such as Midjourney, Runway, ChatGPT…etc. However, those services have to compute on the cloud and then generate the result which means we need to log in to their cloud server. Data security will become another issue because our profile and results generated will become their AI training material. To avoid such kinds of situations, today we will guide you on how to run AI GC on an MSI gaming desktop. MSI MEG Trident X2 and MPG Infinite X2 use the most powerful GPU NVIDIA RTX 4090. It provides effective performance in AI computing. Run AI GC locally faster without network issues and also better for your data security. Let's follow the next instructions to install Stable Diffusion web UI on the MSI gaming desktop.

The painting created by Stable Diffusion.
Before moving into the tutorial, there are a few AI GC open sources on the internet that we can use personally. Today we are going to introduce the Stable Diffusion web UI created by AUTOMATIC1111 on Git Hub. Let’s step-by-step guide you on how to install the Stable Diffusion web UI. Remember during installation, the process needs to install several models so it is better to keep PC storage space has 50 GB to make sure the installation runs successfully.
1. Install Git and Python Tools.
To visit git web page and then download “64-bit Git for Windows Setup”. And install it. Just keep clicking next to finish the whole tool installation. Only need to notice to check the “Windows Explorer integration” option. Like the picture we show you below.
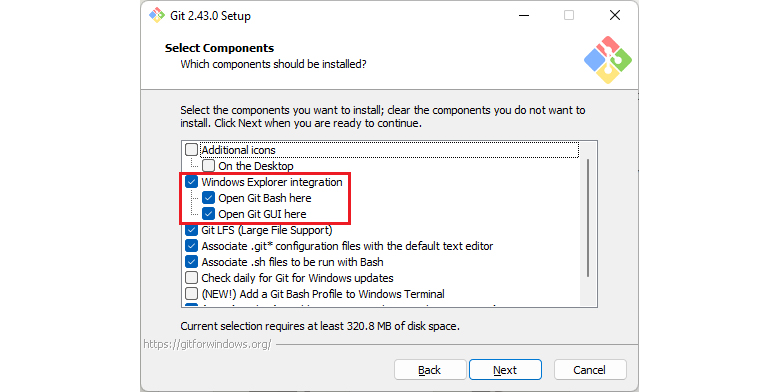
Remember to make sure “Windows Explorer Integration” is checked then finish the installation.
Noted: The file download from the git webpage may without file format. So we have need to rename and add “.exe” behind the file then it can install it.
To visit the Python web page and install version 3.10.6 Python for Stable Diffusion operation. Download the file “Windows installer (64-bit)”. Remember to check “Add Python 3.10 to PATH” during Python installation then press Install Now to finish the process.
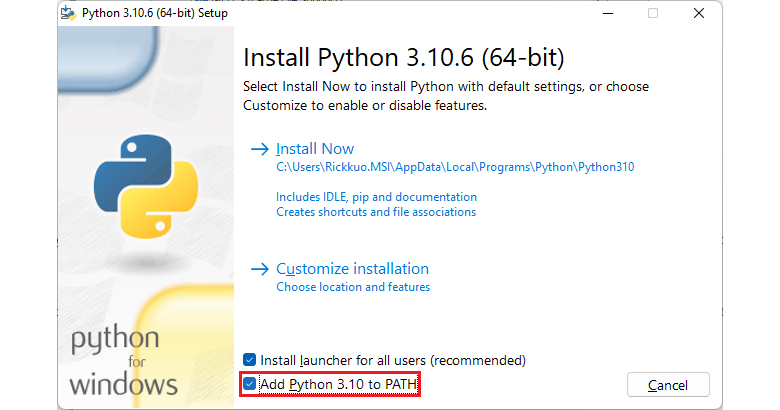
Check “Add Python 3.10 to PATH” then start to install Python and finish the process.
2. Create a folder for Stable Diffusion web UI and install.
Find a storage drive that has sufficient space and create a folder for Stable Diffusion installation.
To right-click your mouse to call the quick menu and select “Open Git Bash here”. It will pop up a command prompt window. Type the command line “git clone https://github.com/AUTOMATIC1111/stable-diffusion-webui.git” and then it will start installing Stable Diffusion web UI.
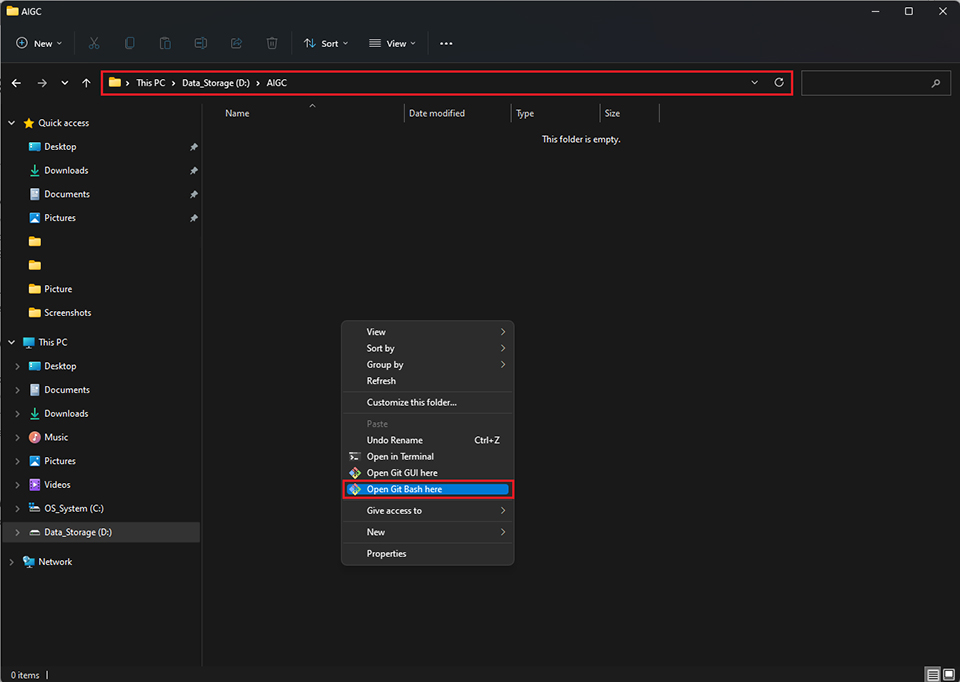
To call the Git command prompt window by clicking Open Git Bash here in the folder that you want to install Stable Diffusion.
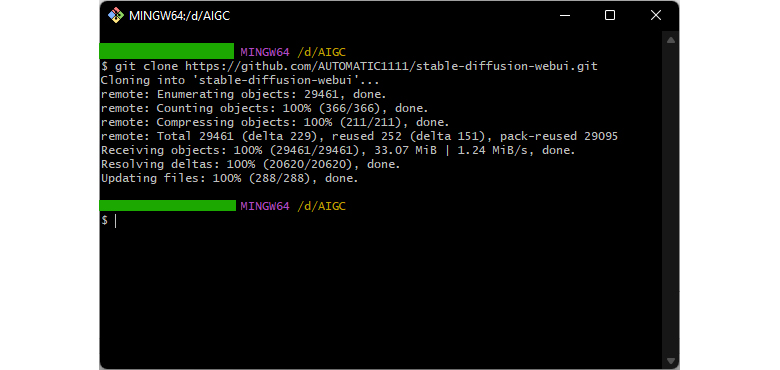
After the process finishes, it will show you the done status like the picture, then we can close the window.
3. Download models put into Stable Diffusion.
After install Stable Diffusion, we need to download the models to application initialize. There are many AI models community on internet so we can find the free models to use. In general, AI GC based on models to generate the result. You can visit CIVITAI and Hugging Face to find the models to use.
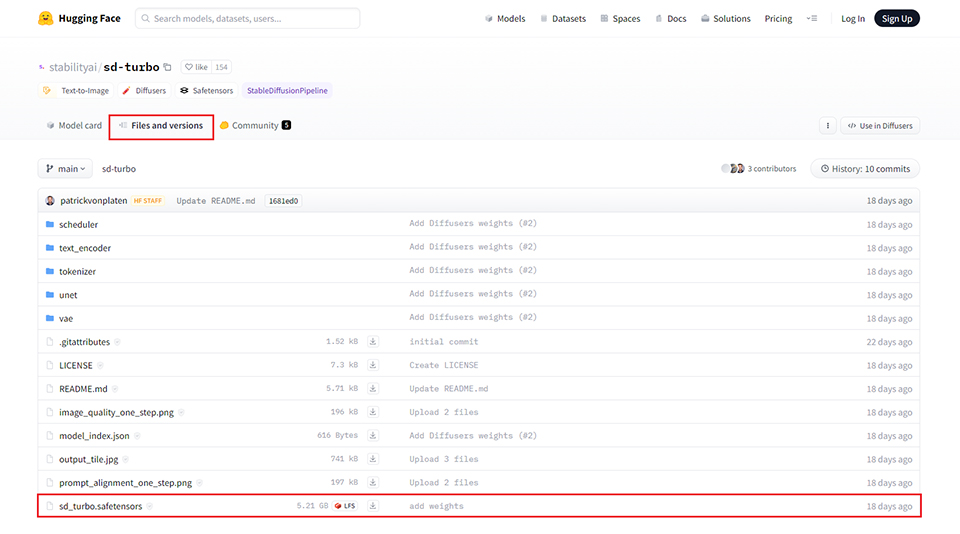
Here is an example, we download SDXL Turbo model. Remember model file format is “*.safetensors”
Then we need to put the download model to the path “\Your Folder\stable-diffusion-webui\models\Stable-diffusion”
4. Initialize Stable Diffusion.
Go to stable-diffusion-webui folder, then right click the webui-user.bat file to call quick menu. Click edit and type “--xformers” behind “set COMMANDLINE_ARGS= “ save it. After that, run the webui-user.bat. The program will starts to download the components for Stable Diffusion and it takes minutes for running. When the process finish, it should auto open the Stable Diffusion web page. If not, you can open your chrome or edge then type 127.0.0.1:7860 to call the web page out.
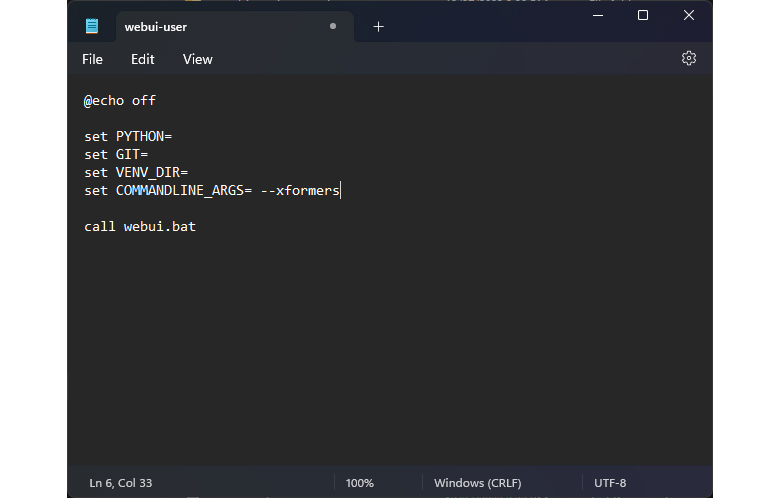
Type “--xformers” behind “set COMMANDLINE_ARGS= “. xformers can speed up computing the result.
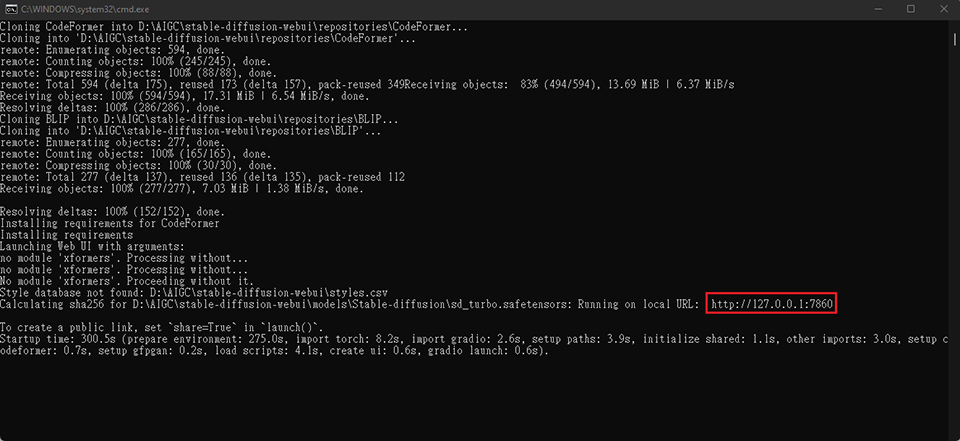
After the process finish, the program will auto start up the web UI. If not, you can manually type the address to http://127.0.0.1:7860 call Stable Diffusion web UI.
Note: The command prompt window doesn’t need to close, it will show you the log of Stable Diffusion. Then we can check the status of generate. Next each time you can run webui-user.bat to open Stable Diffusion.
This is the web UI of Stable Diffusion, then we can start to generate the picture you want. We will guide you a little intro about Stable Diffusion web UI and how to use it. Firstly, apply the models we download in Stable Diffusion checkpoint. Then type the prompt or descriptions about your painting. The Negative prompt can help to avoid the bad works generate. Sampling steps can increase the painting quality high could be better, but sometimes too much could make painting bad. Width and Height is painting resolution, you can adjust you need. Batch count can generate more pictures in once. Seed is mean the picture’s ID, if you found the picture style you like want to keep, then click the dice to keep it. Then you can generate picture within the styles.
Stable Diffusion web UI still keep updating. There are so many package inside we can use. If you interesting about it, join those AI community can get more information.
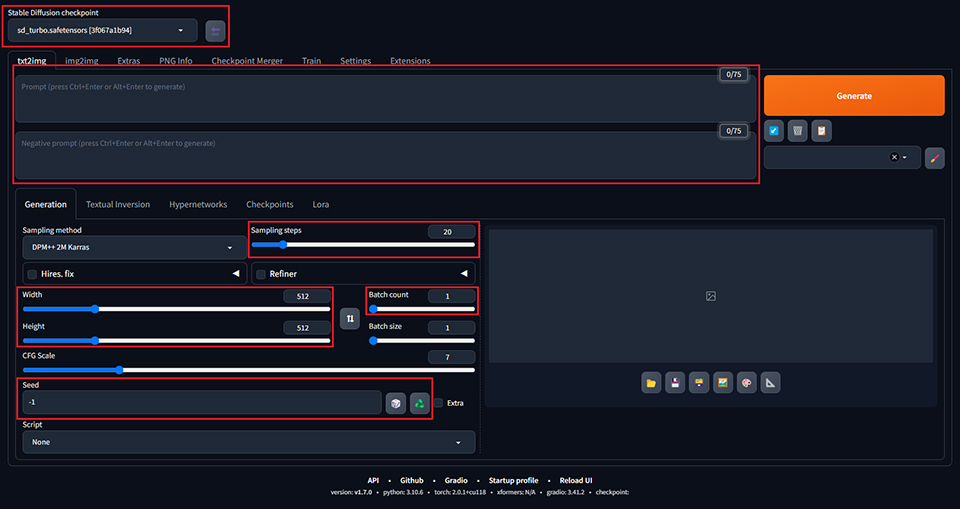
The Stable Diffusion web UI like that, type in the prompt and description, then we can generate the picture we want.

Finally, if you are interested in more AI computing functions on MSI Gaming Desktop. Please keep looking at the MSI blog. We are going to introduce our latest AI technology, AI Engine in the next article. It can help you automatic configure system performance when you running different software or application in various scenarios and it is going to launch in CES 2024!