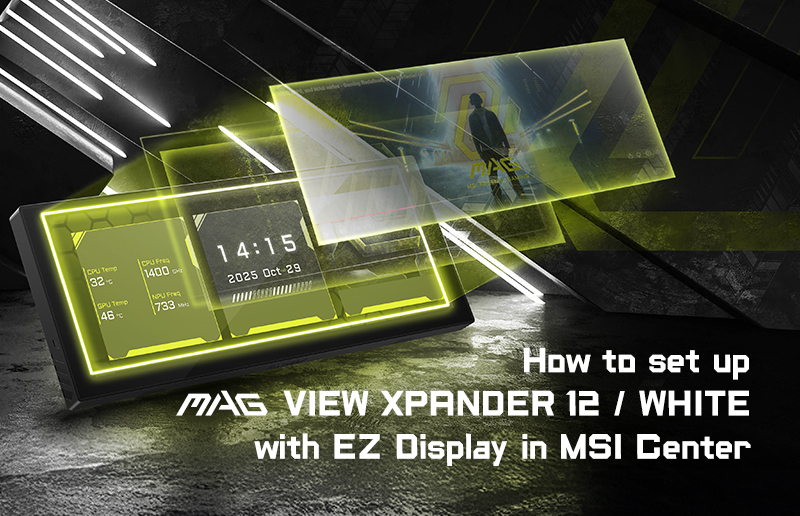
How to Set Up MAG VIEW XPANDER 12 / WHITE with MSI Center
Case & Components
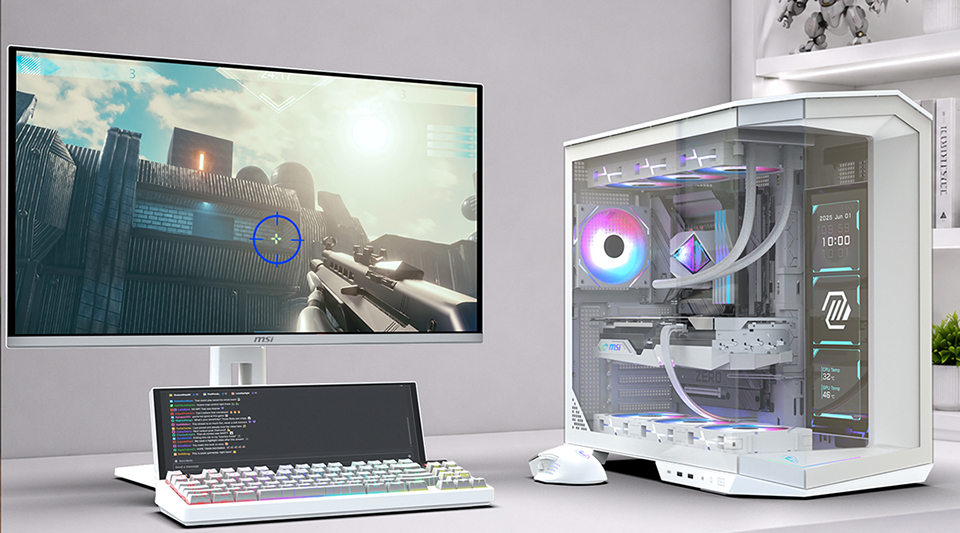
MAG VIEW XPANDER 12 / WHITE is a flexible 12.3-inch secondary display designed to keep useful information or customized content within easy view while your main monitor stays focused on the primary task. It can show real-time hardware data, personalize your setup with photos or videos, or provide extra Windows desktop space for chat, streaming tools, and reference content. This guide shows you how to connect the display, install EZ Display in MSI Center, and configure each mode.
Set Up EZ Display in MSI Center
- Install MSI Center version 2.0.74.0 or later.
- Connect MAG VIEW XPANDER 12 / WHITE to your PC with one of the supplied USB cables. The USB connection carries both power and display data, so no HDMI or DisplayPort cable is required.
- Open MSI Center and go to Feature Sets.
- Find EZ Display and install the feature. If it is already installed, click Open.
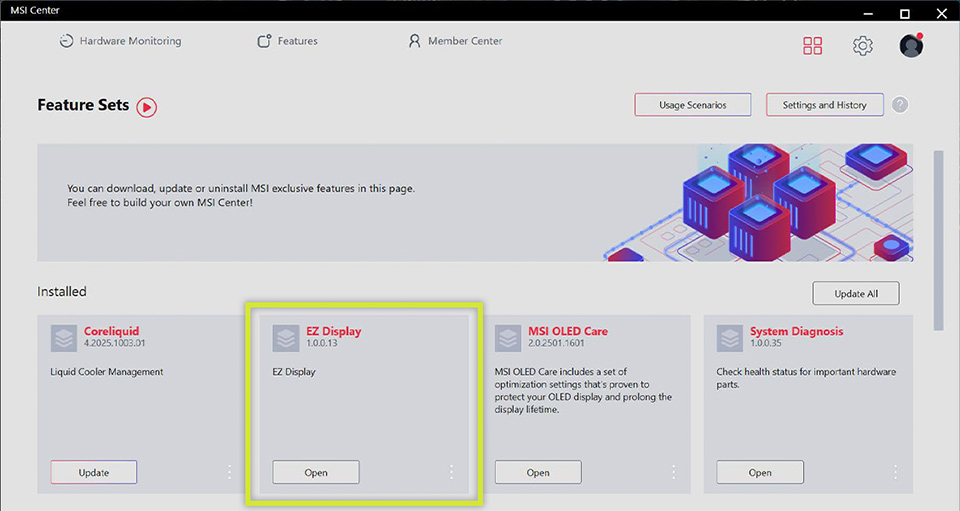
- Open EZ Display from Features, then select MAG VIEW XPANDER 12 to begin setup.
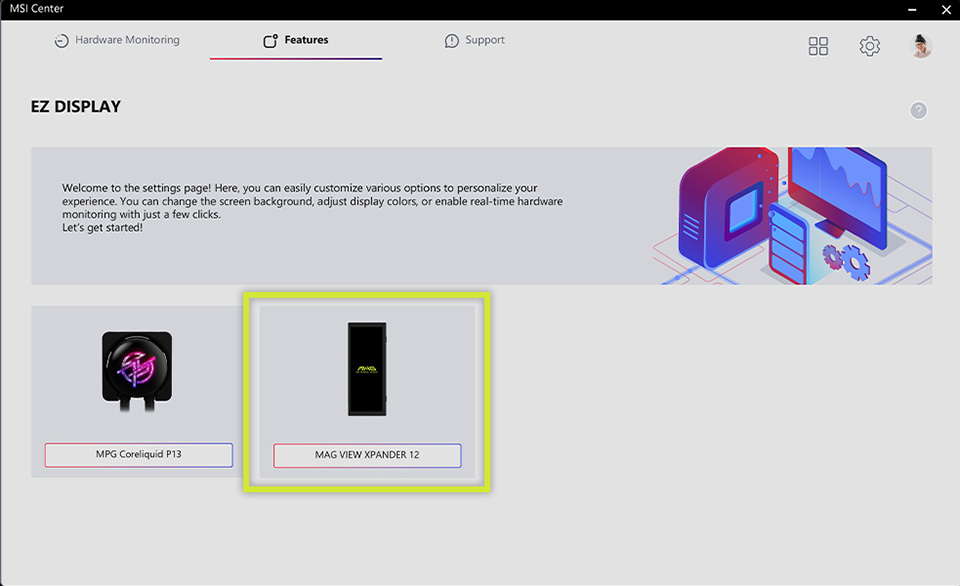
- EZ Display is required for the initial setup. Until the feature is installed and the panel is selected in MSI Center, the screen will continue to show the startup animation.
Choose a Display Mode
EZ Display offers three ways to use the panel. Block Display combines up to three information or media blocks. Background Display fills the screen with one image or video. Extended Display adds Windows desktop space for another application.
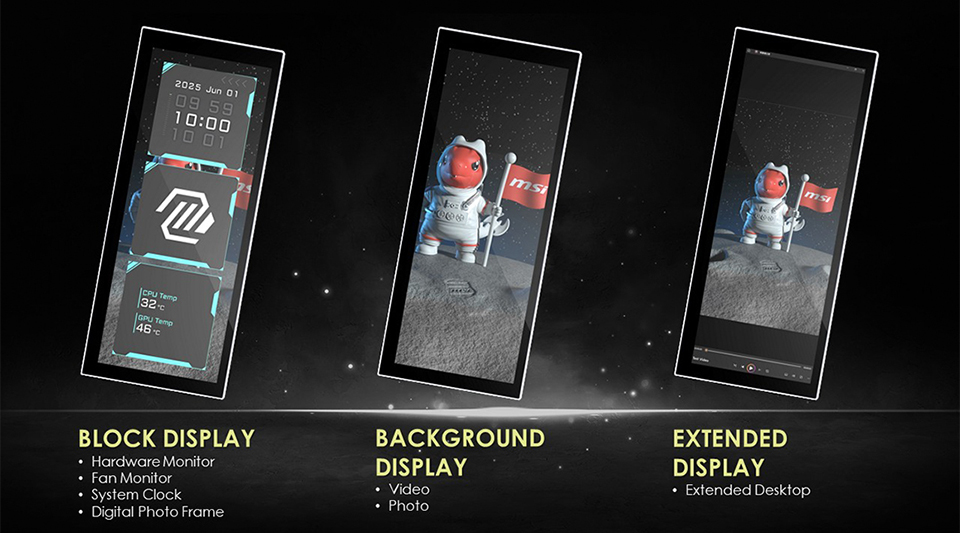
A. Block Display
Block Display lets you combine up to three functions on one screen. Assign Hardware Monitor, Fan Monitor, System Clock, or Digital Photo Frame to each block, then arrange the mix that works best for your setup.
Hardware Monitor
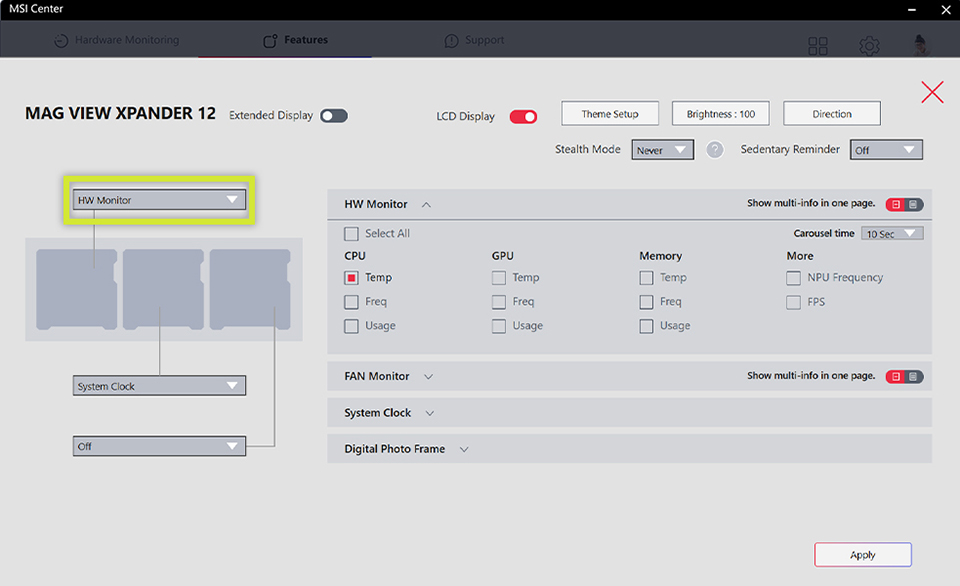
Use HW Monitor to keep CPU and GPU readings, memory information, NPU frequency, and frame rate visible while you work or play. Available readings depend on your hardware and the sensors detected by EZ Display.
- Assign Hardware Monitor to a display block, then open HW Monitor.
- Select the readings you want to display, such as CPU temperature, GPU usage, memory frequency, NPU frequency, or frame rate.
- Choose a single-value layout for a larger reading, or enable Show multi-info in one page to view several readings together. Follow the item-selection requirement shown in the interface.
- Set Carousel time if you want EZ Display to cycle through several readings or monitoring pages, then click Apply.
Fan Monitor
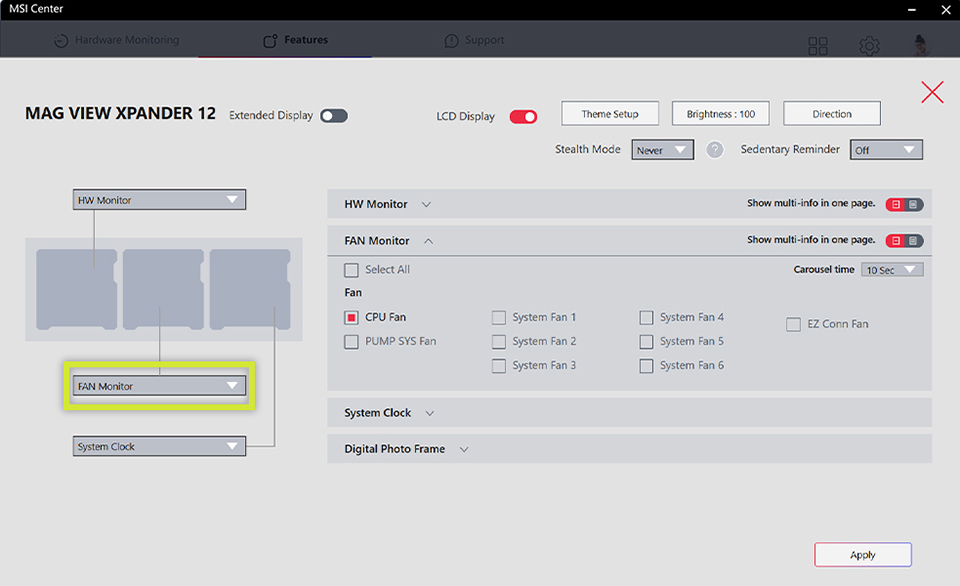
Fan Monitor gives fan speeds their own display option, keeping CPU, pump, system, and EZ Conn fan speeds visible in a dedicated block. Pair it with Hardware Monitor and System Clock to create a complete three-block monitoring layout.
- Assign Fan Monitor to a display block, then open Fan Monitor.
- Select the fan speeds you want to display.
- Choose a single-value layout for a larger reading, or enable show multi-info in one page to view several fan speeds together.
- Set Carousel time if you want EZ Display to cycle through multiple fan readings, then click Apply.
System Clock
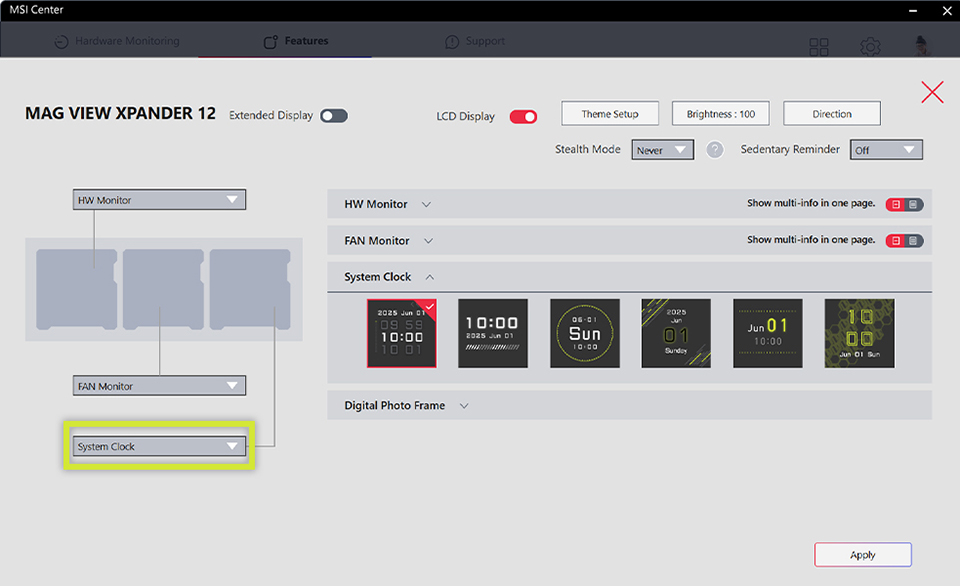
Add a clock to keep the time visible beside your system information or personal content.
- Assign System Clock to a display block, then open the System Clock section.
- Select a clock style, click Apply, and check the result on the panel.
Digital Photo Frame
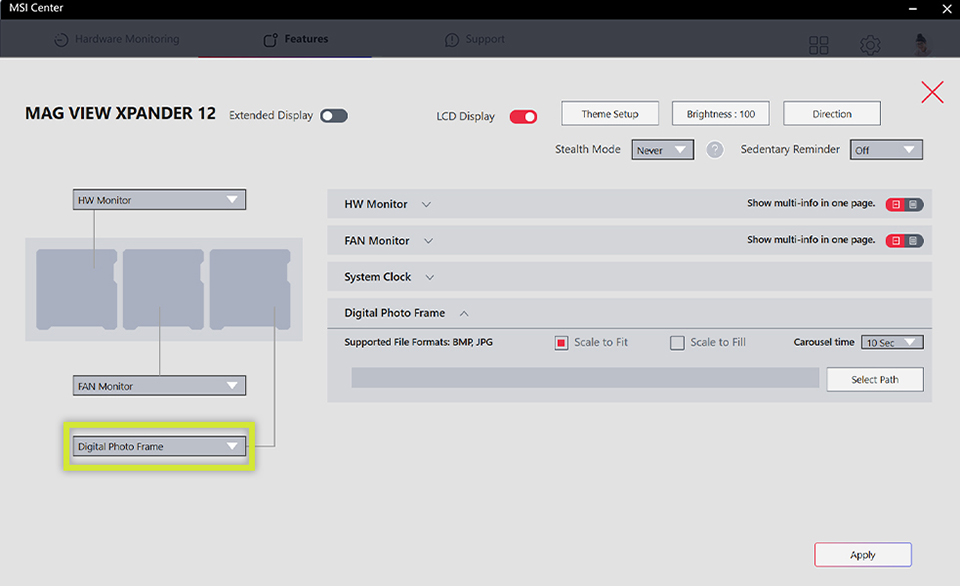
Turn a folder of images into a slideshow that rotates directly on the panel.
- Assign Digital Photo Frame to a display block, then open its settings.
- Click Select Path and choose the folder that contains your images. Supported images include BMP and JPG files.
- Choose Scale to Fit to show the full image, or Scale to Fill to cover the block. Set Carousel time, then click Apply.
Customize the Block Layout
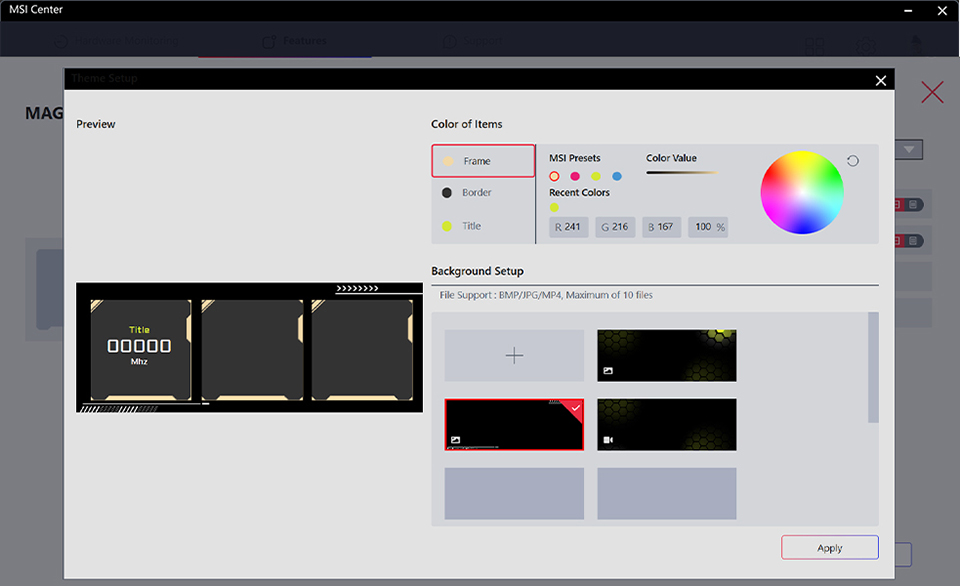
Theme Setup changes the frame, border, title color, transparency, and background without changing the functions assigned to each block.
Turn a folder of images into a slideshow that rotates directly on the panel.
- Click Theme Setup on the main EZ Display page.
- Under Color of Items, select Frame, Border, or Title. Choose a preset or use the color picker.
- Adjust frame transparency to control how much of the background remains visible behind the blocks.
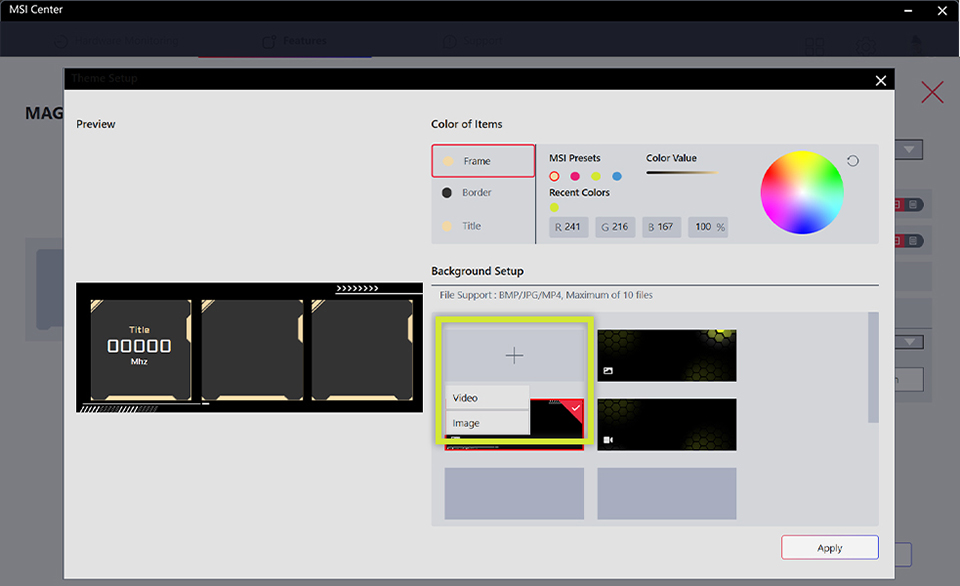
- Under Background Setup, click the plus tile and choose Image or Video. Import a BMP or JPG image or an MP4 video, then select its thumbnail. You can add up to 10 files.
- Check Preview Sample, then click Apply to update the display.
B. Background Display
Background Display hides the content blocks so one image or MP4 video can fill the entire panel. Use it for a full-screen wallpaper, logo, animation, or branded visual.
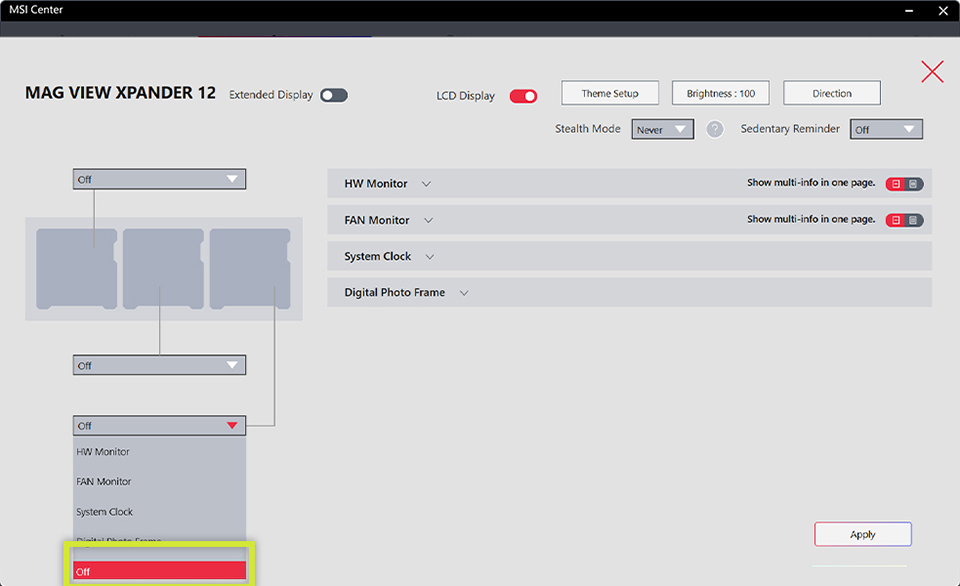
- Set all three display blocks to Off.
- Open Theme Setup and import an image or MP4 video under Background Setup. Select the thumbnail, check the preview, then click Apply. MP4 videos play continuously in a loop.
C. Extended Display
Extended Display adds the panel to your Windows desktop, giving chat, streaming tools, monitoring software, or reference content a dedicated place beside your main application.
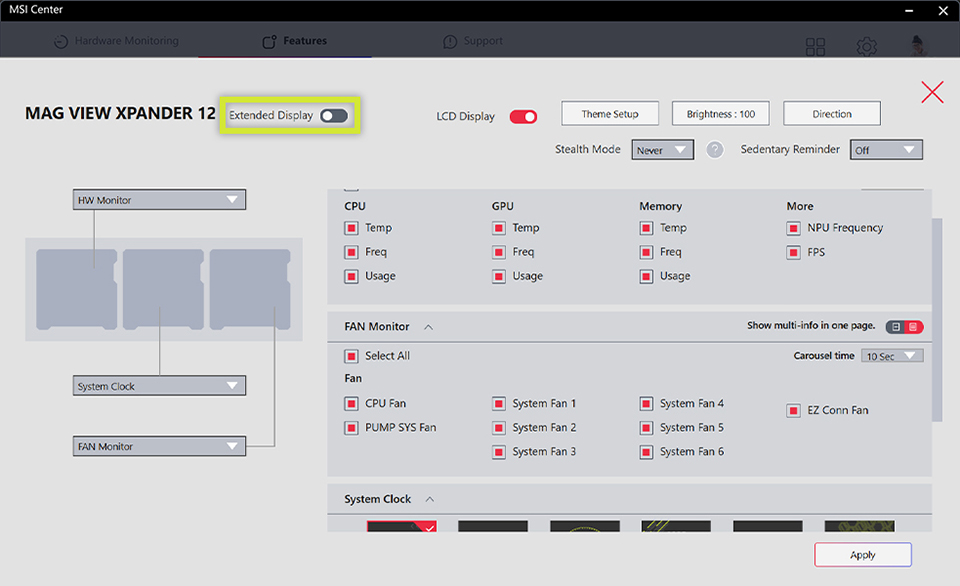
- Turn on Extended Display on the main EZ Display page.
- In Windows, open Settings > System > Display. If needed, press Windows + P and select Extend.
- Arrange the displays to match their physical placement, then apply the layout.
Frequently Asked Questions
Do I need MSI Center before using MAG VIEW XPANDER 12 / WHITE
Yes. Install MSI Center version 2.0.74.0 or later and add EZ Display through Feature Sets. Without EZ Display, the panel will continue to show the startup animation.
Can I combine hardware readings with a clock and photos
Yes. Assign HW Monitor, FAN Monitor, System Clock, or Digital Photo Frame to any of the three display blocks, then click Apply.
Can I use a video as the background
Yes. Import an MP4 file through Background Setup, select its thumbnail, check the preview, and click Apply.
How do I use the panel as a Windows monitor
Enable Extended Display in EZ Display, then select Extend in Windows if needed. You can then move application windows onto the panel.
Does MAG VIEW XPANDER 12 / WHITE require HDMI or DisplayPort
No. A supplied USB cable carries both power and display data, so no HDMI or DisplayPort connection is required.
Start Customizing Your Display
Download MSI Center or visit the MAG VIEW XPANDER 12 / WHITE product page to get started.
- Software: https://www.msi.com/PC-Component/MAG-VIEW-XPANDER-12-WHITE/support#utility
- Product Page: https://www.msi.com/PC-Component/MAG-VIEW-XPANDER-12-WHITE